
Introduction
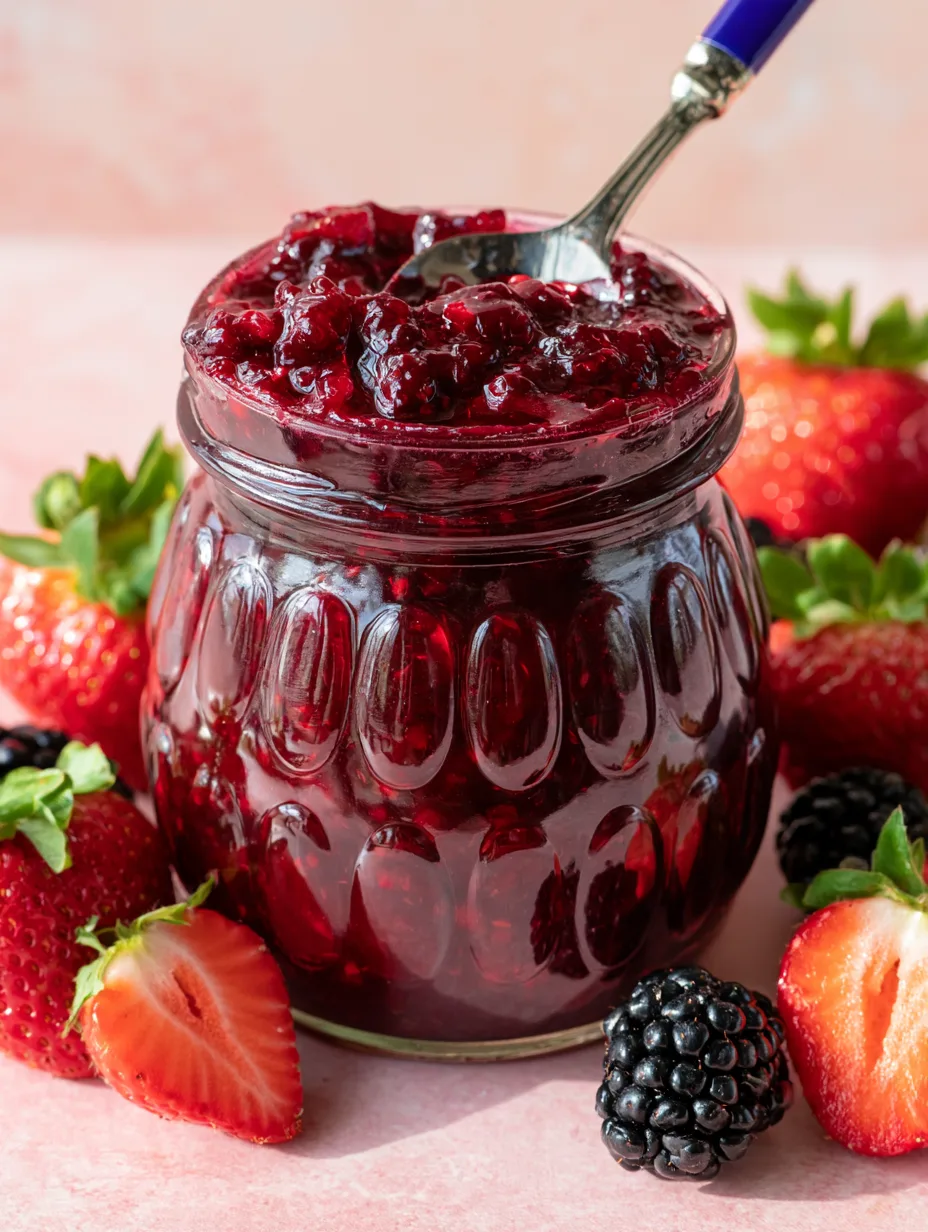
Bright, jewel-toned berries bubbling gently in a saucepan, filling the kitchen with a sweet, fruity aroma, make homemade jam feel wonderfully special. Making Low Sugar Jam gives you that fresh, spreadable fruit flavor without relying on the large amounts of sugar found in many traditional preserves. The result tastes vibrant, naturally fruity, and pleasantly balanced, with enough sweetness to complement the fruit instead of hiding it. Whether you use strawberries, raspberries, blueberries, or a mixed berry blend, this simple method makes small-batch jam approachable and rewarding. You’ll learn…
Why You’ll Love This Recipe
There is something incredibly satisfying about Making Low Sugar Jam from fresh, ripe fruit. You control the ingredients, sweetness, texture, and final flavor, which makes homemade jam much more appealing than many overly sweet store-bought versions.
The biggest advantage comes from the fruit itself. Ripe berries provide natural sweetness, acidity, color, and aroma, while a smaller amount of sugar simply rounds everything out. A little lemon juice adds brightness and helps keep the flavor lively.
You will also love the texture. Properly cooked jam offers a beautiful contrast between soft fruit pieces and a thick, glossy spread. You can leave some berries chunky for a rustic finish or mash them more thoroughly for a smoother consistency.
This recipe also works beautifully for small batches. You do not need specialized equipment or hours of cooking. A saucepan, spoon, clean jars, and a handful of everyday ingredients can turn fresh fruit into a delicious homemade spread.
Ingredients
For approximately 2 cups of low-sugar jam, gather:
- 4 cups (600 g) fresh or frozen berries, such as strawberries, raspberries, blueberries, or blackberries
- 1/2 cup (100 g) granulated sugar, adjusted according to the fruit’s sweetness
- 2 tablespoons (30 ml) fresh lemon juice, for brightness and balanced acidity
- 1 tablespoon (15 ml) water, only if needed at the beginning of cooking
- 1 tablespoon (8 g) chia seeds, optional, for naturally thickening the jam
- 1 teaspoon (5 ml) vanilla extract, optional, for a softer, more rounded flavor
Choose fruit that tastes flavorful before cooking. Since this is a reduced-sugar recipe, bland or underripe fruit will produce less satisfying results. If using frozen berries, you can cook them directly from frozen, although the mixture may need a few extra minutes to thicken.
Pro Tips
The first important tip for Making Low Sugar Jam is to choose flavorful fruit. Sugar normally contributes both sweetness and structure, so reducing it makes the quality of the fruit much more noticeable. Use ripe berries whenever possible, and taste them before deciding whether to add the full amount of sugar.
Second, avoid rushing the cooking process. Keep the fruit at a gentle simmer rather than blasting it over high heat. Stir regularly and scrape the bottom of the pan so the fruit cooks evenly without scorching. The mixture should gradually become thicker and glossier.
Finally, test the consistency before you decide the jam is finished. Spoon a little onto a chilled plate and wait several seconds. Push it gently with your finger. If it wrinkles slightly and moves slowly, you are close to the ideal consistency.
If you prefer a thicker jam without adding more sugar, chia seeds provide an easy option. Add them near the end, then allow the finished jam to sit for several minutes so they can absorb moisture.
Step-by-Step Instructions
Step 1: Prepare the fruit
Wash fresh berries thoroughly and remove stems, leaves, or damaged portions. If you use strawberries, cut large berries into smaller pieces so they cook evenly. Frozen fruit requires no thawing, which makes this recipe particularly convenient.
Place the fruit in a medium, heavy-bottomed saucepan. Add the sugar and lemon juice, then stir gently until everything combines.
Step 2: Let the fruit release its juices
Set the saucepan over medium heat. Stir occasionally as the fruit begins to soften and release its natural juices.
After several minutes, you should see plenty of liquid collecting around the fruit. If your berries seem unusually dry, add the tablespoon of water. Avoid adding unnecessary water because extra liquid can make the finished jam take longer to thicken.
Step 3: Simmer gently
Bring the mixture to a gentle simmer. Reduce the heat slightly and continue cooking for approximately 15 to 25 minutes, stirring frequently.
As the berries soften, use the back of your spoon or a potato masher to crush some of the fruit. Leave a few pieces intact if you enjoy a chunky homemade texture.
Watch the pan closely during the final minutes. The mixture will thicken more noticeably as moisture evaporates.
Step 4: Check the consistency
Place a small plate in the freezer while the jam cooks. When you think the mixture looks ready, spoon a small amount onto the chilled plate.
Wait about 30 seconds, then gently push the jam. It should move slowly and look thick rather than watery. Remember that jam continues to thicken as it cools, so do not cook it until it looks completely firm in the saucepan.
Step 5: Add optional ingredients
Remove the saucepan from the heat. Stir in vanilla extract if desired. For a thicker low-sugar spread, stir in the chia seeds and allow the jam to stand for about 5 to 10 minutes.
Taste carefully. If the fruit tastes sharper than expected, you can add a small amount of additional sugar while the jam remains warm.
Step 6: Cool and store
Transfer the warm jam into clean jars, leaving a little space at the top. Let it cool before sealing and refrigerating.
Once chilled, the texture should become thicker and easier to spread. Give the jam a gentle stir before serving if necessary.
Variations
One of the best things about Making Low Sugar Jam is how easily you can change the fruit and flavor profile.
For a classic strawberry version, use chopped strawberries with lemon juice and a touch of vanilla. The result tastes bright, fragrant, and perfect for toast or biscuits.
For a mixed berry jam, combine strawberries, blueberries, raspberries, and blackberries. The different fruits create a deeper flavor with plenty of natural tartness.
You can also create a raspberry-lemon version by using extra lemon zest along with the juice. For a warming variation, add a small pinch of cinnamon.
If you want to avoid refined sugar completely, replace the granulated sugar with a suitable natural sweetener. Keep in mind that different sweeteners can change the texture and cooking behavior, so add them gradually and taste as you go.
For a vegan-friendly recipe, no special substitutions are necessary. The basic fruit, lemon, sugar, and chia combination already fits naturally into a plant-based diet.
Storage and Serving
After Making Low Sugar Jam, refrigerate the finished jam in clean, airtight jars. Because this recipe uses significantly less sugar than traditional jam, do not assume it has the same shelf stability as a commercially canned preserve. Treat it as a refrigerator jam unless you use a tested canning recipe designed specifically for reduced-sugar preserves.
For the best quality, use refrigerated jam within about 1 to 2 weeks and always use a clean spoon when serving. If you notice mold, fermentation, an unusual smell, or an off appearance, discard the entire jar.
Serve your homemade jam generously on warm toast, English muffins, pancakes, waffles, or freshly baked biscuits. It also makes a delicious filling for thumbprint cookies and layer cakes.
For a simple breakfast, spoon it over Greek yogurt with granola and fresh fruit. You can even swirl a little into oatmeal for a naturally fruity finish.
FAQs
1. Can I make jam with frozen fruit?
Yes. Frozen berries work very well. Add them directly to the saucepan and allow a few extra minutes for cooking.
2. Why is my jam too runny?
The fruit may contain more water than expected, or the mixture may need additional cooking time. Simmer it gently for a few more minutes and retest the consistency.
3. Can I reduce the sugar even further?
Yes, but sugar affects sweetness, texture, and preservation. For very low-sugar versions, consider chia seeds or a tested low-sugar pectin recipe.
4. Do I need pectin?
Not necessarily. Many berries naturally thicken as they cook. Chia seeds can also help create a thicker consistency. Pectin becomes useful when you want a more firmly set jam.
5. How do I make smoother jam?
Mash the fruit thoroughly during cooking. For an exceptionally smooth texture, strain the cooked mixture through a fine-mesh sieve to remove seeds.
This Making Low Sugar Jam recipe is comfort food at its finest — bright, fruity, naturally flavorful, and wonderfully easy to prepare in a small batch. It’s the kind of homemade staple that turns everyday breakfasts into something special, whether you’re spreading it over toast, spooning it onto pancakes, or swirling it through creamy yogurt. By letting ripe fruit provide most of the flavor, you create a jam that tastes fresh rather than overwhelmingly sweet. Keep a jar chilled in your refrigerator, and you’ll always have a colorful, homemade treat ready for breakfast, baking, or afternoon snacks.
Print
Making Low Sugar Jam
- Total Time: 45
Description
Making Low Sugar Jam is an easy way to capture the bright flavor of ripe fruit in a delicious homemade spread. It is naturally fruity, beautifully glossy, and perfect for breakfast or baking.
Ingredients
- 4 cups (600 g) fresh or frozen berries
- 1/2 cup (100 g) granulated sugar
- 2 tablespoons (30 ml) fresh lemon juice
- 1 tablespoon (15 ml) water, if needed
- 1 tablespoon (8 g) chia seeds, optional
- 1 teaspoon (5 ml) vanilla extract, optional
Instructions
- Wash and prepare fresh berries, removing stems and damaged portions. Cut large strawberries into smaller pieces.
- Add berries, sugar, and lemon juice to a medium heavy-bottomed saucepan.
- Cook over medium heat, stirring occasionally, until the fruit softens and releases its juices.
- Reduce the heat and gently simmer for 15 to 25 minutes, stirring frequently.
- Mash some or all of the fruit according to your preferred texture.
- Test the jam on a chilled plate to check whether it has thickened sufficiently.
- Remove from heat and stir in vanilla and optional chia seeds.
- Let the jam stand for 5 to 10 minutes to thicken further.
- Transfer the warm jam to clean jars and allow it to cool.
- Seal and refrigerate until ready to serve.
- Prep Time: 15
- Cook Time: 20
- Category: Cooking
- Cuisine: American