
Introduction
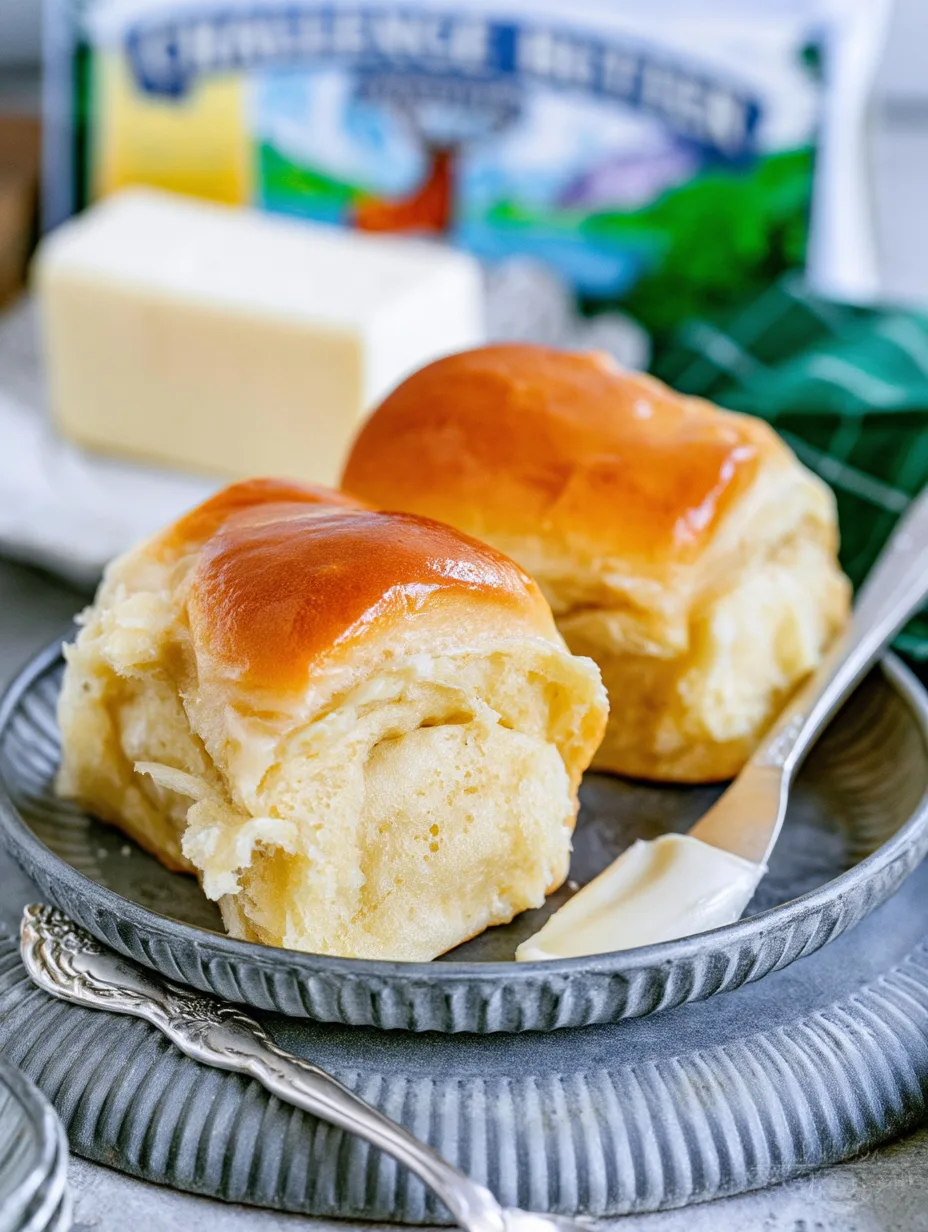
Soft, fluffy, buttery, and irresistibly golden, CParker House RollsLoves bring homemade bakery magic straight to your kitchen. These delicious dinner rolls feature a tender interior, a lightly crisp exterior, and a rich buttery flavor that makes every bite special. Perfect for holiday gatherings, Sunday dinners, or everyday meals, they pair beautifully with almost anything. Their classic homemade charm makes them impossible to resist. You’ll learn… how to make soft, flavorful rolls that everyone will reach for twice.
Why You’ll Love This Recipe
There is something truly special about freshly baked dinner rolls, especially when they come out of the oven warm, golden, and brushed with melted butter. CParker House RollsLoves deliver everything you want in homemade bread: a pillowy texture, a delicate sweetness, and a rich buttery taste.
Here are a few reasons to add this recipe to your baking collection:
-
Incredibly soft texture: Each roll has a tender, fluffy center that practically melts in your mouth.
-
Beautiful golden finish: A generous butter brushing creates an appealing golden surface with a subtle shine.
-
Simple ingredients: You probably already have most of the ingredients in your pantry and refrigerator.
-
Perfect for gatherings: These rolls make an excellent addition to Thanksgiving, Christmas, family dinners, and celebrations.
-
Make-ahead friendly: Prepare the dough ahead of time and bake when you’re ready to serve.
The contrast between the delicate crust and soft interior makes every bite satisfying. Serve them warm with butter, honey, or your favorite savory spread.
Ingredients
You’ll need a handful of everyday baking ingredients to create these delicious buttery rolls. For the best results, measure everything accurately and use fresh yeast.
-
4 cups (500 g) all-purpose flour: Creates a soft, tender dough with enough structure to hold its shape.
-
2 ¼ teaspoons (7 g) active dry yeast: Helps the dough rise and develop its light texture.
-
1 cup (240 ml) warm whole milk: Adds moisture and richness. Keep it around 105–110°F (40–43°C).
-
¼ cup (50 g) granulated sugar: Adds a gentle sweetness and supports yeast activity.
-
1 large egg: Helps enrich the dough and improve its structure.
-
¼ cup (57 g) unsalted butter, softened: Gives the rolls their signature buttery flavor.
-
1 teaspoon salt: Balances the sweetness and enhances flavor.
-
3 tablespoons (42 g) melted butter: For brushing the rolls before or after baking.
These ingredients create a wonderfully soft dough that bakes into beautiful homemade dinner rolls.
Pro Tips
A few simple techniques can make the difference between ordinary dinner rolls and exceptionally soft homemade bread.
1. Check your yeast before mixing.
Use warm milk rather than hot milk. Temperatures that are too high can damage the yeast and prevent the dough from rising properly. If you’re using active dry yeast, let it sit with the warm milk and a little sugar for about 5–10 minutes. A foamy surface indicates that the yeast is active.
2. Avoid adding too much flour.
The dough should feel soft and slightly tacky, not dry or stiff. Add flour gradually while mixing. Too much flour creates dense rolls instead of the fluffy texture you’re looking for. If the dough sticks slightly to your hands, that’s perfectly normal.
3. Give the dough enough time to rise.
Patience is essential when making homemade bread. Let the dough rise in a warm, draft-free place until it doubles in size. After shaping, allow the rolls to rise again before baking. This second rise creates a lighter crumb and helps the rolls bake evenly.
For an extra delicious finish, brush the warm rolls with melted butter immediately after baking. This adds flavor and keeps the tops beautifully soft.
Step-by-Step Instructions
Making CParker House RollsLoves is easier than you might think. Follow these simple steps, and you’ll have a beautiful batch of homemade rolls ready to share.
Step 1: Activate the yeast
Pour the warm milk into a small bowl. Add the active dry yeast and one tablespoon of the sugar. Stir gently and let the mixture stand for 5–10 minutes.
Look for a foamy layer on top. This tells you the yeast has activated and is ready to use. If nothing happens, check the freshness of your yeast before continuing.
Step 2: Combine the ingredients
In a large mixing bowl, combine the flour, remaining sugar, and salt. Add the yeast mixture, egg, and softened butter.
Mix everything until a shaggy dough forms. You can use a stand mixer fitted with a dough hook or mix by hand with a sturdy wooden spoon.
Step 3: Knead the dough
Knead the dough for approximately 8–10 minutes using a stand mixer on medium-low speed, or about 10–12 minutes by hand.
The dough should become smooth, elastic, and slightly tacky. If it feels extremely sticky, sprinkle in a little flour, one tablespoon at a time. Avoid adding too much.
Step 4: Let the dough rise
Transfer the dough to a lightly greased bowl. Turn it once so the surface gets a little oil or butter.
Cover the bowl with a clean kitchen towel or plastic wrap. Leave it in a warm place for approximately 1–1½ hours, or until it doubles in size.
Don’t rush this step. A proper first rise helps develop the soft texture that makes homemade rolls so delicious.
Step 5: Shape the rolls
Gently press down the risen dough to release excess air. Transfer it to a lightly floured work surface.
Divide the dough into 12–15 equal portions, depending on your preferred roll size. Shape each portion into a smooth ball by pulling the edges underneath.
Arrange the dough balls in a greased 9-by-13-inch baking dish, leaving a little space between them for expansion.
Step 6: Allow the second rise
Cover the shaped rolls loosely and let them rise again for 30–45 minutes.
They should look noticeably puffier and begin touching one another. Meanwhile, preheat your oven to 350°F (175°C).
This second rise gives the rolls their beautiful light and airy interior.
Step 7: Bake until golden
Place the baking dish in the preheated oven. Bake for approximately 18–22 minutes, or until the tops turn lightly golden and the centers cook through.
Keep an eye on them during the final minutes because oven temperatures can vary.
Step 8: Brush with butter and serve
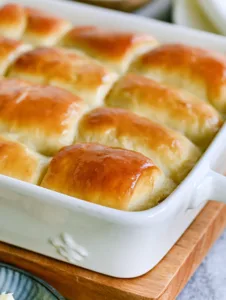
Remove the rolls from the oven and immediately brush the tops generously with melted butter.
Let them cool for a few minutes before serving. Enjoy them warm while the centers remain wonderfully soft and fluffy.
Variations
One of the best things about homemade dinner rolls is how easily you can customize them.
1. Honey Butter Rolls
Replace part of the granulated sugar with honey for a slightly floral sweetness. Once baked, brush the tops with a mixture of melted butter and honey. This version tastes especially delicious alongside roasted vegetables or holiday meals.
2. Garlic Herb Rolls
Add ½ teaspoon garlic powder and one tablespoon of finely chopped fresh parsley or rosemary to the dough. After baking, brush the rolls with melted butter mixed with minced garlic and herbs.
3. Whole Wheat Dinner Rolls
Replace up to half of the all-purpose flour with whole wheat flour. You may need an extra tablespoon or two of milk because whole wheat flour absorbs more moisture. The result will have a slightly heartier texture and a deeper flavor.
Each variation gives these classic buttery dinner rolls a different personality while keeping their delicious homemade appeal.
Storage and Serving
Freshly baked rolls taste best on the day you make them, but you can easily store leftovers for another meal.
Room temperature: Allow the rolls to cool completely. Place them in an airtight container or resealable bag and store them at room temperature for up to 3 days.
Refrigerator: Refrigeration can dry out homemade bread, so room-temperature storage works better for short periods.
Freezer: Freeze completely cooled rolls in a freezer-safe bag for up to 2 months. Thaw them at room temperature before reheating.
Reheating: Warm individual rolls in the microwave for 10–15 seconds. For several rolls, cover them loosely with foil and heat in a 300°F (150°C) oven for approximately 8–10 minutes.
For serving, try these delicious ideas:
-
Serve alongside roasted chicken, turkey, or beef.
-
Pair with creamy soups, hearty stews, or vegetable casseroles.
-
Enjoy warm with salted butter, honey, or homemade jam.
Frequently Asked Questions
1. Why didn’t my dinner rolls rise?
Your yeast may have expired, or the milk may have been too hot or too cold. Make sure the yeast is active and give the dough enough time to rise in a warm environment.
2. Can I prepare the dough ahead of time?
Yes! Prepare the dough, place it in a covered bowl, and refrigerate it after the first rise or during the initial rising stage. Allow it to come closer to room temperature before shaping and completing the second rise.
3. How do I keep my rolls soft?
Avoid adding too much flour, knead the dough properly, and don’t overbake the rolls. Brushing their tops with melted butter immediately after baking also helps maintain a soft finish.
4. Can I use instant yeast instead of active dry yeast?
Absolutely. Use the same amount of instant yeast and mix it directly with the dry ingredients. You can add the warm milk with the remaining wet ingredients.
5. Can I freeze homemade dinner rolls?
Yes! Let the baked rolls cool completely before freezing them in an airtight freezer bag. Freeze for up to 2 months and thaw before reheating.
This CParker House RollsLoves is comfort food at its finest, with buttery golden tops, irresistibly fluffy centers, and a delicate sweetness that makes every bite memorable. It’s the kind of homemade bread that brings everyone together around the dinner table, whether you’re celebrating a holiday, hosting a family gathering, or enjoying a cozy weeknight meal. Serve them warm with your favorite dishes, and don’t be surprised when everyone reaches for another. Once you experience how easy and delicious homemade rolls can be, you’ll want to bake them again and again!
Print
CParker House RollsLoves
- Total Time: 45
Description
Soft, fluffy, and brushed with delicious melted butter, these homemade Parker House rolls are the perfect addition to any dinner table. One bite, and they’ll become a family favorite!
Ingredients
-
4 cups (500 g) all-purpose flour
-
2 ¼ teaspoons (7 g) active dry yeast
-
1 cup (240 ml) warm whole milk
-
¼ cup (50 g) granulated sugar
-
1 large egg
-
¼ cup (57 g) unsalted butter, softened
-
1 teaspoon salt
-
3 tablespoons (42 g) melted butter, for brushing
Instructions
-
Combine warm milk, active dry yeast, and one tablespoon of sugar. Let stand for 5–10 minutes until foamy.
-
Mix flour, remaining sugar, and salt in a large bowl.
-
Add the yeast mixture, egg, and softened butter. Mix until a dough forms.
-
Knead for 8–10 minutes in a stand mixer or 10–12 minutes by hand until smooth and elastic.
-
Transfer the dough to a greased bowl, cover, and let rise for 1–1½ hours until doubled in size.
-
Gently punch down the dough and divide into 12–15 equal portions.
-
Shape each portion into a smooth ball and arrange in a greased 9-by-13-inch baking dish.
-
Cover and let rise for another 30–45 minutes until puffy.
-
Preheat the oven to 350°F (175°C).
-
Bake for 18–22 minutes until the tops turn golden.
-
Remove from the oven and brush immediately with melted butter.
-
Let cool slightly and serve warm.
- Prep Time: 25
- Category: lunche
- Cuisine: amircain