
There’s something irresistible about Crispy Japanese Katsu Bowls — that glorious golden crust, the juicy tender meat, the soft vinegared rice beneath, and the drizzle of savory-sweet tonkatsu sauce that ties it all together. This comforting Japanese dish, often called Katsu Donburi or Crispy Chicken Katsu Rice Bowl, transforms simple ingredients into a satisfying, restaurant-quality meal right at home.
Imagine the crunch as you slice through the panko-coated cutlet, the steam rising from freshly cooked rice, and that balance of crisp, juicy, and saucy in one bite. That’s the beauty of Japanese Katsu Bowls — hearty, nostalgic, and surprisingly easy to make.
In this guide, you’ll learn exactly how to make the perfect Crispy Japanese Katsu Bowl, from mastering that golden fry to building layers of flavor with perfectly seasoned rice and homemade tonkatsu sauce.
Why You’ll Love These Crispy Japanese Katsu Bowls
-
Crispy yet Juicy Perfection – Every bite has that satisfying crunch with tender meat inside.
-
Authentic Japanese Flavor – Inspired by classic Katsu Donburi found in Tokyo’s comfort-food restaurants.
-
Easy Weeknight Dinner – From prep to plate in under 45 minutes.
-
Customizable Protein – Use chicken, pork, or even tofu for a vegetarian twist.
-
Budget-Friendly – Simple pantry ingredients transformed into a restaurant-style meal.
-
Kid-Approved – Mild and crunchy, it’s a hit with picky eaters.
-
Make-Ahead Friendly – Cook the cutlets ahead and assemble later for quick meals.
-
Beautifully Balanced – Crispy, savory, tangy, and sweet — everything in perfect harmony.
Ingredients for the Perfect Crispy Japanese Katsu Bowls
Below is everything you’ll need to make Crispy Japanese Katsu Bowls, with substitutions and tips for getting the best texture and flavor.
For the Katsu
-
2 pieces chicken breasts or pork loin – Chicken gives a lighter, juicier texture, while pork offers that traditional Crispy Pork Katsu Rice Bowl richness.
-
Salt and pepper, to taste – Essential for flavor balance before breading.
-
1 cup all-purpose flour – Helps the egg adhere; gluten-free works too.
-
2 large eggs – Create a sticky layer for the panko.
-
1 cup panko breadcrumbs – The secret to that crunchy Japanese Katsu Rice Bowl texture.
-
½ cup vegetable oil (for frying) – Use neutral oil like canola or peanut for clean frying.
For the Rice
-
1 cup Japanese short-grain rice – Key for authentic donburi texture; sticky yet soft.
-
1½ cups water
-
2 tbsp rice vinegar – Adds subtle tang and shine to the rice.
-
1 tbsp sugar – Balances acidity; optional for sweetness.
-
1 tsp salt – Rounds out the flavor.
For the Sauce
-
½ cup tonkatsu sauce – Either store-bought or homemade (see below).
-
2 tbsp soy sauce – Deepens umami.
-
1 tbsp Worcestershire sauce – Adds tang and body.
-
2 tbsp ketchup – Gives the sauce its sweet-savory kick.
For the Toppings
-
1 cup shredded cabbage – Adds crisp freshness.
-
2 tbsp sliced green onions – For color and flavor.
-
1 tbsp sesame seeds – Nutty accent for aroma.
-
Pickled ginger, to taste – Optional, but brightens the whole dish.
Step-by-Step: How to Make Crispy Japanese Katsu Bowls
1. Prepare the Rice
Rinse the rice in cold water until the water runs clear. Soak for 30 minutes to help achieve that perfect Japanese texture.
Bring 1½ cups of water to a boil, add rice, then reduce to low heat. Cover and simmer for 15 minutes.
Once done, mix rice vinegar, sugar, and salt — pour over rice and gently fold. The result? Lightly seasoned, glossy rice perfect for your Crispy Japanese Chicken Katsu Bowl with Rice.
2. Pound and Season
Flatten the chicken breasts to about ½ inch thick. This ensures even frying and tenderness. Season both sides with salt and pepper.
3. Bread the Chicken
Set up a breading station:
-
Bowl 1: flour
-
Bowl 2: beaten eggs
-
Bowl 3: panko breadcrumbs
Dredge each piece in flour (shake off excess), dip in egg, then coat in panko — press firmly to ensure the crumbs stick.
4. Fry to Golden Perfection
Heat oil in a skillet over medium heat until shimmering (around 350°F / 175°C).
Carefully fry the chicken for 4–5 minutes per side, until golden brown and crispy.
Drain on paper towels. This is where your Crispy Japanese Katsu Bowl earns its name — golden, crunchy, and aromatic.
5. Make the Sauce
In a small bowl, whisk together tonkatsu sauce, soy sauce, Worcestershire, and ketchup. Taste and adjust — you want that perfect balance of tang, sweetness, and umami.
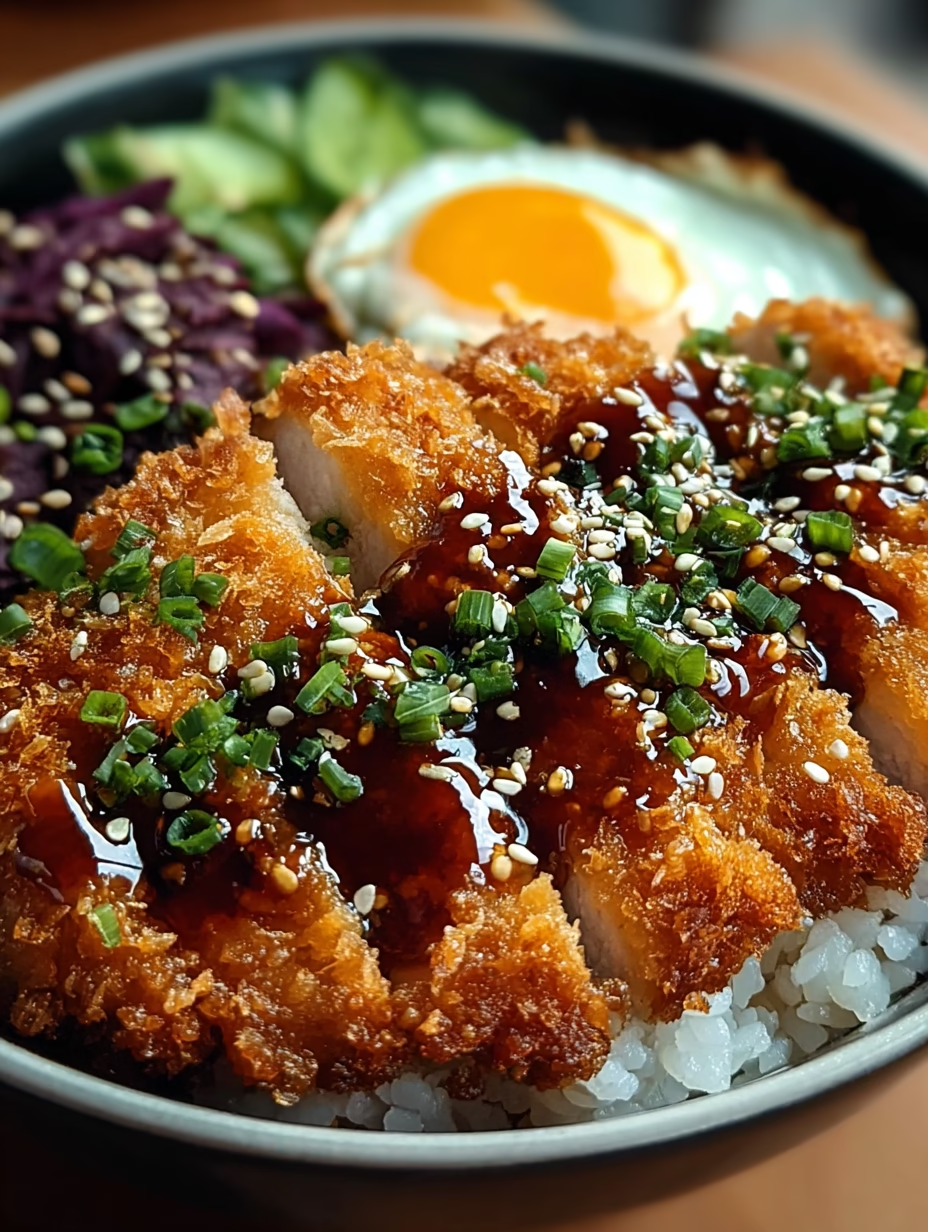
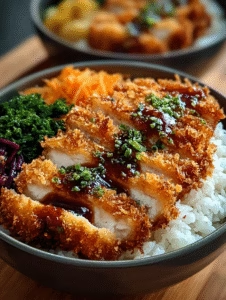
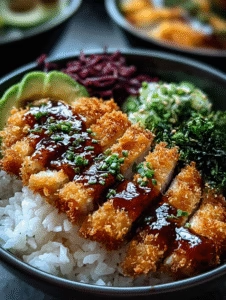
6. Assemble the Bowl
Layer warm rice at the bottom of your bowl. Add sliced chicken katsu or pork katsu on top.
Drizzle with sauce, add shredded cabbage, green onions, and sesame seeds. Finish with pickled ginger for contrast.
Pro Tips for the Best Crispy Japanese Katsu Bowls
How do I keep my katsu crispy after frying?
Drain on a wire rack instead of paper towels — airflow keeps the crust crisp. Avoid covering it too soon.
Can I make the rice in a rice cooker?
Absolutely. Use the same ratio (1 cup rice to 1½ cups water). Add vinegar seasoning after cooking for authentic Japanese Katsu Rice Bowl flavor.
How can I make gluten-free Crispy Katsu Bowls?
Use rice flour instead of all-purpose, gluten-free panko, and tamari instead of soy sauce. You’ll still get the same crunchy golden crust.
What’s the difference between Katsu Donburi and regular katsu?
Katsu Donburi usually has the katsu simmered in sauce with egg on top of rice, while Crispy Japanese Katsu Bowls keep the cutlet crispy and separate — a modern twist.
Can I meal-prep or freeze katsu?
Yes! Freeze fried cutlets on a tray, then store in freezer bags for up to 2 months. Reheat in the oven to keep that crisp crunch.
Best Ways to Serve Crispy Japanese Katsu Bowls
-
Serve alongside Miso Soup or Japanese Cucumber Salad.
-
Try with Garlic Butter Edamame for contrast.
-
Add a soft-boiled egg for richness.
-
Pair with Teriyaki Chicken Skewers for a mixed donburi feast.
(Internal links suggestion: link to “Garlic Butter Steak Bites,” “Teriyaki Chicken,” and “Japanese Fried Rice” posts.)
Nutrition Breakdown (Per Serving)
| Nutrient | Amount | % Daily Value |
|---|---|---|
| Calories | 640 kcal | 32% |
| Protein | 34g | 68% |
| Carbs | 62g | 20% |
| Fat | 25g | 38% |
| Saturated Fat | 5g | 25% |
| Sodium | 850mg | 35% |
| Fiber | 2g | 8% |
| Sugar | 6g | — |
Storage & Leftovers
-
Fridge: Store in airtight containers up to 3 days. Keep sauce separate.
-
Freezer: Up to 2 months. Reheat directly from frozen in oven at 375°F (190°C) for 15 minutes.
-
Reheat: Oven or air fryer preferred — microwave softens the crust.
-
Rice: Store separately to avoid sogginess.
FAQs About Crispy Japanese Katsu Bowls
Can I bake instead of fry?
Yes. Bake breaded chicken at 400°F (200°C) for 20–25 minutes, flipping halfway. It’s a lighter version of Crunchy Japanese Katsu Rice Bowls.
Is katsu the same as schnitzel?
They’re similar in method, but Japanese Katsu Bowls use panko, creating a lighter and crispier texture.
What’s the best oil for frying?
Canola, peanut, or sunflower oil — they handle high heat and maintain a neutral flavor.
Can I use tofu or shrimp instead of chicken?
Yes! Try crispy tofu katsu or shrimp katsu for exciting variations.
Variations of Japanese Katsu Bowls
-
Pork Tonkatsu Bowl: Use pork loin for a richer, traditional version.
-
Chicken Katsu Curry Bowl: Top with Japanese curry sauce.
-
Tofu Katsu Bowl: Perfect vegetarian alternative.
-
Spicy Katsu Bowl: Add chili oil or Sriracha to the sauce.
-
Katsu Donburi (Egg Simmered): Pour beaten eggs over the fried cutlet and simmer briefly in dashi sauce before serving.
Conclusion
Crispy Japanese Katsu Bowls deliver comfort, crunch, and soul in every bite. Whether it’s a cozy weeknight dinner or a show-stopping meal for friends, this recipe proves that simple ingredients can create extraordinary results.