
Introduction
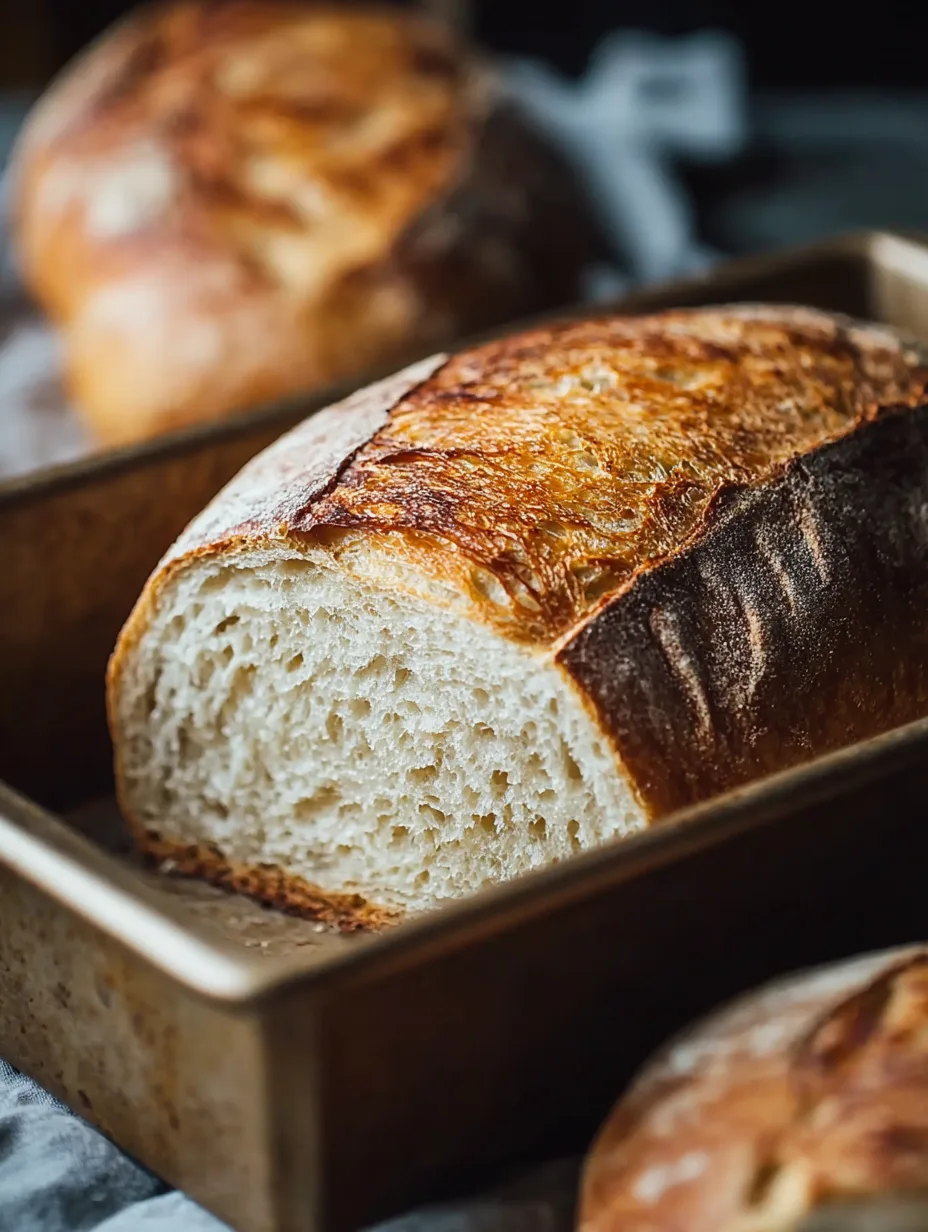
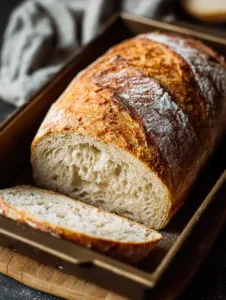
The aroma of freshly baked sourdough, with its crisp crust and tender, chewy crumb, has a way of filling the kitchen with pure comfort. Baking Sourdough in a Loaf Pan takes that classic artisan experience and makes it more approachable for home bakers who want consistency and structure without sacrificing flavor. This method delivers a beautifully risen loaf with even slices and reliable results every time. Whether you are new to sourdough or refining your technique, Baking Sourdough in a Loaf Pan offers simplicity and confidence. You’ll learn…
Why You’ll Love This Recipe
You’ll love this recipe because it blends old-world sourdough character with modern convenience. Baking Sourdough in a Loaf Pan removes the guesswork that often comes with free-form loaves, especially if shaping feels intimidating. The pan supports the dough as it rises, creating a tall, evenly baked loaf with a crackly crust and soft interior. Each slice shows off that signature open crumb balanced with just enough chew. This method also fits neatly into busy schedules since the dough behaves more predictably during proofing. If you enjoy rustic flavor but want sandwich-ready slices, this recipe hits the sweet spot between artisanal and practical baking.
Ingredients
To make one standard loaf using Baking Sourdough in a Loaf Pan, you’ll need a short list of quality ingredients. Use 500 g (about 4 cups) bread flour for strong gluten development and structure. Add 350 g (1½ cups) warm filtered water to hydrate the dough and encourage fermentation. Include 100 g (½ cup) active sourdough starter at peak activity for balanced tang and lift. Finish with 10 g (2 teaspoons) fine sea salt to enhance flavor and strengthen the dough. These simple ingredients work together to create a loaf with depth, aroma, and satisfying texture.
Pro Tips
The first key to success with Baking Sourdough in a Loaf Pan is starter timing. Use your starter when it has doubled and smells mildly sweet, not sharp. Second, focus on proper gluten development. Gentle stretch-and-folds during bulk fermentation build strength without overworking the dough. Third, watch fermentation, not the clock. Temperature and starter activity affect timing, so look for dough that has risen about 30 to 40 percent and feels airy yet elastic. Grease your loaf pan lightly to prevent sticking, and line with parchment if you want easy removal and clean edges.
Instructions
Step 1: Mix the Dough
In a large bowl, combine bread flour and water until no dry bits remain. Let the mixture rest for 30 minutes to hydrate the flour and jump-start gluten formation.
Step 2: Add Starter and Salt
Mix in the active sourdough starter and salt. Use your hands to gently squeeze and fold until fully incorporated. The dough will feel sticky but cohesive.
Step 3: Bulk Fermentation
Cover the bowl and let the dough rest at room temperature. Over the next 3 to 4 hours, perform three sets of stretch-and-folds every 30 minutes. This builds strength and structure.
Step 4: Shape the Dough
Turn the dough onto a lightly floured surface. Gently shape it into a log that matches the length of your loaf pan without deflating it.
Step 5: Final Proof
Place the dough seam-side down into a greased loaf pan. Cover and let it proof until it rises close to the rim and springs back slowly when pressed.
Step 6: Bake
Preheat the oven to 230°C (450°F). Bake for 20 minutes, then reduce heat to 200°C (400°F) and bake another 20 to 25 minutes until deep golden brown.
Step 7: Cool
Remove the loaf from the pan and cool completely on a rack before slicing to set the crumb.
Variations
Once you master Baking Sourdough in a Loaf Pan, variations are easy. For a whole wheat version, replace up to 30 percent of the bread flour with whole wheat flour and add a splash of extra water. For flavor lovers, fold in roasted garlic and herbs for a savory loaf similar to garlic pasta with bacon in depth and richness. You can also try a seeded crust by brushing the top with water and sprinkling sesame or sunflower seeds before baking. Each variation keeps the same reliable structure while offering new tastes.
Storage and Serving
Store your loaf at room temperature in a paper bag or wrapped in a clean towel for up to two days. For longer storage, slice and freeze in an airtight bag for up to three months. Baking Sourdough in a Loaf Pan makes bread perfect for toast, sandwiches, or dipping into olive oil and soup. Serve it warm with butter, alongside eggs for breakfast, or as a base for hearty avocado toast. The even slices make it ideal for daily use.
FAQs
Can I use all-purpose flour instead of bread flour?
Yes, but the loaf may be slightly less chewy and tall.
Do I need a Dutch oven for this recipe?
No, the loaf pan provides structure and even baking.
How do I know when the dough is ready to bake?
It should rise near the rim and slowly spring back when pressed.
Can I refrigerate the dough overnight?
Yes, cold proofing enhances flavor and fits busy schedules.
Why did my loaf turn out dense?
Under-fermentation or inactive starter often causes density.
Conclusion
This Baking Sourdough in a Loaf Pan is comfort food at its finest — a reliable, aromatic loaf with a crisp crust and tender crumb made approachable for home bakers. It’s the kind of dish that turns everyday meals into something special, whether you’re slicing it for sandwiches, toasting it for breakfast, or sharing it fresh from the oven with family.
Print
Baking Sourdough in a Loaf Pan
- Total Time: 45 minutes
Description
If rustic sourdough feels intimidating, this loaf pan method changes everything. Get bakery-style slices with less stress and more confidence at home.
Ingredients
-
500 g bread flour
-
350 g warm water
-
100 g active sourdough starter
-
10 g fine sea salt
Instructions
-
Mix flour and water until combined and rest for 30 minutes.
-
Add sourdough starter and salt, mixing until fully incorporated.
-
Let dough ferment, performing stretch-and-folds every 30 minutes for 3 to 4 hours.
-
Shape dough into a log and place into a greased loaf pan.
-
Proof until risen near the rim and slightly springy.
-
Bake at 230°C (450°F) for 20 minutes, then 200°C (400°F) for 20 to 25 minutes.
-
Cool completely before slicing.
- Prep Time: 15 minutes
- Cook Time: 30 minutes
- Category: Breakfast
- Cuisine: American