
Introduction
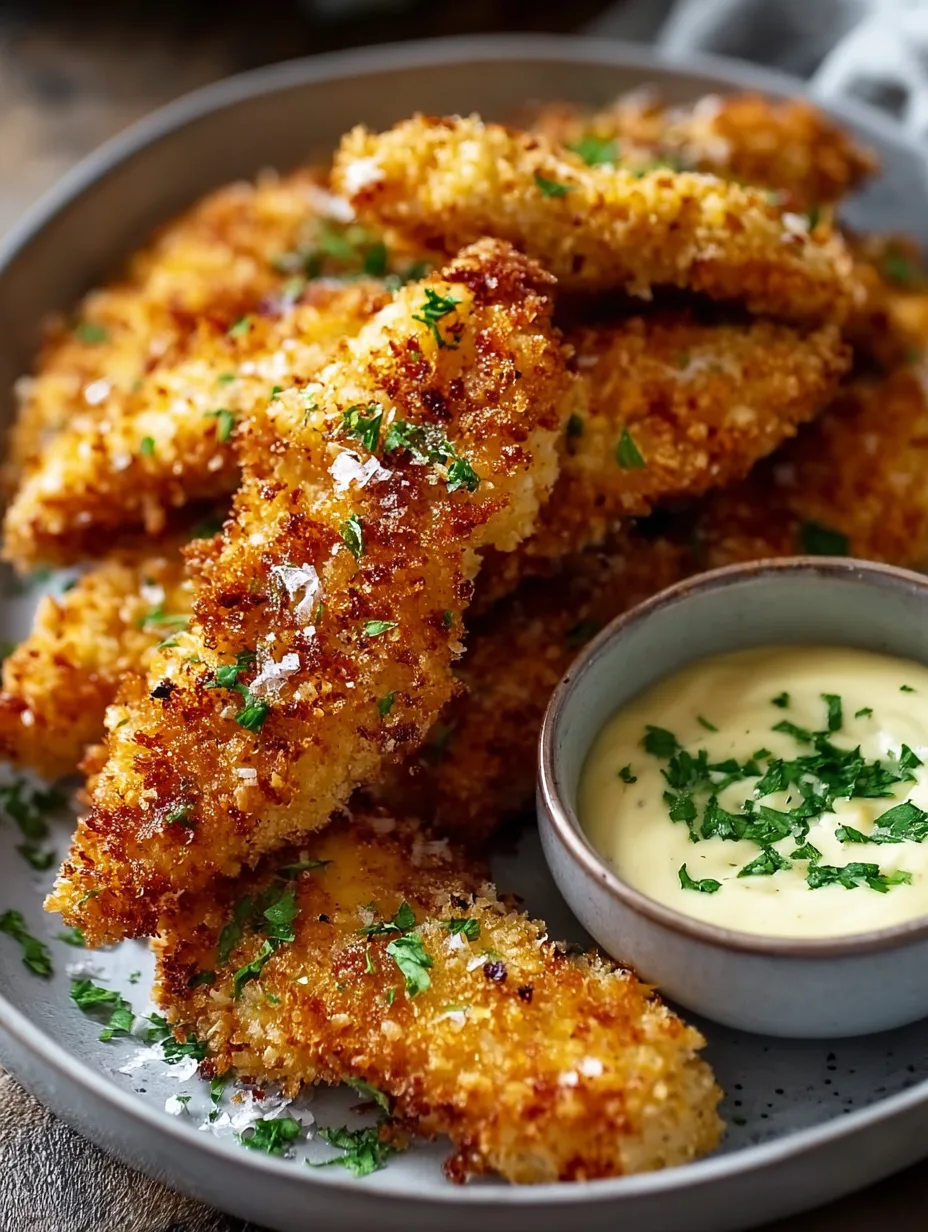
Golden, crispy, and irresistibly crunchy, Ultimate Panko Crusted Chicken Strips deliver that perfect bite every time. Each strip shatters with a light, airy crunch before revealing juicy, tender chicken inside. Unlike traditional breadcrumbs, panko creates a delicate crispness that feels restaurant-worthy yet easy to achieve at home. Whether you’re planning a family dinner or prepping a game-day snack platter, this recipe guarantees bold flavor and satisfying texture. You’ll learn how to achieve maximum crunch, lock in moisture, and create chicken strips everyone will crave.
Why You’ll Love This Recipe
There’s something magical about biting into crispy chicken that actually stays crispy. Ultimate Panko Crusted Chicken Strips stand out because they combine texture, flavor, and simplicity in one reliable recipe. The coarse panko breadcrumbs create an airy crust that fries up golden and light instead of heavy or greasy. Meanwhile, the seasoned flour and egg coating build layers of flavor in every bite.
You’ll also love how versatile this recipe feels. Serve the strips with classic honey mustard, toss them in buffalo sauce, or pair them with a fresh salad for balance. The contrast between the crunchy exterior and the juicy, tender interior makes each bite deeply satisfying.
These chicken strips cook quickly and use pantry staples. You can fry, bake, or air fry them with consistent results. If you’ve enjoyed crispy buttermilk chicken tenders or oven baked chicken strips before, this recipe will become your new favorite go-to.
Ingredients
To make Ultimate Panko Crusted Chicken Strips, gather the following ingredients:
-
1½ lbs (680 g) boneless, skinless chicken breasts, cut into 1-inch strips
-
1 cup (120 g) all-purpose flour
-
1 teaspoon salt
-
½ teaspoon black pepper
-
1 teaspoon garlic powder
-
1 teaspoon paprika
-
2 large eggs
-
2 tablespoons (30 ml) milk
-
1½ cups (90 g) panko breadcrumbs
-
½ cup (50 g) grated Parmesan cheese (optional, for extra flavor)
-
3 cups (720 ml) vegetable oil for frying
Choose fresh chicken for the juiciest results. Panko breadcrumbs provide the signature crunch, while garlic powder and paprika add depth and subtle warmth.
Pro Tips for Perfect Crunch
First, pat the chicken completely dry before dredging. Excess moisture prevents the coating from sticking properly and reduces crispiness. Dry chicken ensures each layer adheres evenly.
Second, follow the three-step breading process carefully: flour, egg wash, then panko. Press the panko firmly onto each strip to create a thick, even coating. This technique builds structure and guarantees that signature crunch.
Third, maintain proper oil temperature. Heat the oil to 350°F (175°C) and monitor it with a thermometer. If the oil runs too cool, the coating absorbs oil and turns soggy. If it runs too hot, the crust browns before the chicken cooks through. Fry in small batches to keep the temperature steady and avoid overcrowding.
These simple techniques transform good chicken strips into truly crispy masterpieces.
Instructions
Step 1: Prepare the Chicken
Slice the chicken breasts into even 1-inch strips. Pat each strip dry with paper towels. Season lightly with a pinch of salt and pepper to build flavor from the inside out.
Step 2: Set Up the Breading Station
Place flour, salt, pepper, garlic powder, and paprika in a shallow bowl and whisk to combine. In a second bowl, beat the eggs with milk until smooth. In a third bowl, add the panko breadcrumbs and Parmesan cheese.
Step 3: Coat the Chicken
Dredge each strip in the seasoned flour, shaking off excess. Dip it into the egg mixture, letting the excess drip away. Finally, press it into the panko mixture, coating all sides thoroughly. Press gently so the crumbs adhere well.
Step 4: Heat the Oil
Pour vegetable oil into a deep skillet or heavy-bottomed pot. Heat to 350°F (175°C). Test with a small crumb; it should sizzle immediately without burning.
Step 5: Fry Until Golden
Carefully lower a few coated strips into the hot oil. Fry for 3–4 minutes per side, turning once, until golden brown and cooked through. The internal temperature should reach 165°F (74°C). Transfer to a wire rack to drain.
Step 6: Serve Hot and Crispy
Serve the Ultimate Panko Crusted Chicken Strips immediately while the crust stays crisp and the interior remains juicy. Pair with your favorite dipping sauces and enjoy.

Variations
For a healthier twist, bake the chicken at 425°F (220°C) for 18–20 minutes on a wire rack set over a baking sheet. Lightly spray the strips with oil to help them crisp.
If you prefer heat, add ½ teaspoon cayenne pepper to the flour mixture or drizzle the cooked strips with buffalo sauce for spicy panko chicken tenders.
For a gluten-free version, swap the flour with a gluten-free blend and use gluten-free panko breadcrumbs. The texture remains crisp and satisfying.
You can also experiment with flavors. Try adding Italian seasoning for a vibe similar to parmesan crusted chicken, or serve alongside garlic pasta with bacon for a hearty comfort meal.
Storage and Serving Suggestions
Store leftover chicken strips in an airtight container in the refrigerator for up to 3 days. Reheat them in a 375°F (190°C) oven for 8–10 minutes to restore crispiness. Avoid microwaving, as it softens the coating.
For serving, arrange Ultimate Panko Crusted Chicken Strips on a platter with honey mustard, ranch dressing, and barbecue sauce. Add fries or coleslaw for a classic comfort meal. For a lighter option, slice the strips and place them over a crisp green salad with lemon vinaigrette.
They also make fantastic sliders. Tuck them into brioche buns with lettuce and spicy mayo for an easy crowd-pleaser.
FAQs
Can I use chicken thighs instead of breasts?
Yes. Boneless, skinless thighs add extra juiciness and rich flavor.
Can I air fry these chicken strips?
Absolutely. Cook at 400°F (200°C) for 10–12 minutes, flipping halfway through.
Why is my coating falling off?
You may have skipped drying the chicken or pressed the panko too lightly. Proper dredging prevents this issue.
Can I prepare them ahead of time?
Yes. Bread the strips and refrigerate for up to 4 hours before frying.
How do I keep them warm for a party?
Place them on a wire rack in a 200°F (95°C) oven until ready to serve. This keeps them crisp.
Conclusion
This Ultimate Panko Crusted Chicken Strips is comfort food at its finest — golden, crunchy on the outside, and juicy on the inside with bold seasoning in every bite. It’s the kind of dish that brings everyone to the table fast, whether you serve it for a casual weeknight dinner or a lively weekend gathering.
Crispy, flavorful, and easy to master, this recipe gives you restaurant-quality results right in your kitchen. Once you hear that satisfying crunch, you’ll want to make it again and again.
Print
Ultimate Panko Crusted Chicken Strips
- Total Time: 45 minutes
Description
Craving that perfect crunch? These Ultimate Panko Crusted Chicken Strips are golden, juicy, and seriously addictive.
Ingredients
-
1½ lbs boneless, skinless chicken breasts, cut into strips
-
1 cup all-purpose flour
-
1 teaspoon salt
-
½ teaspoon black pepper
-
1 teaspoon garlic powder
-
1 teaspoon paprika
-
2 large eggs
-
2 tablespoons milk
-
1½ cups panko breadcrumbs
-
½ cup grated Parmesan cheese (optional)
-
3 cups vegetable oil for frying
Instructions
-
Slice chicken breasts into even strips and pat dry.
-
Mix flour, salt, pepper, garlic powder, and paprika in a bowl.
-
Whisk eggs and milk in a separate bowl.
-
Place panko and Parmesan in a third bowl.
-
Dredge chicken in flour, dip in egg mixture, then coat in panko, pressing firmly.
-
Heat oil to 350°F and fry chicken in batches until golden and cooked through.
-
Drain on a wire rack and serve hot with your favorite dipping sauces.
- Prep Time: 15 minutes
- Cook Time: 30 minutes
- Category: Lunch
- Cuisine: American