
Introduction
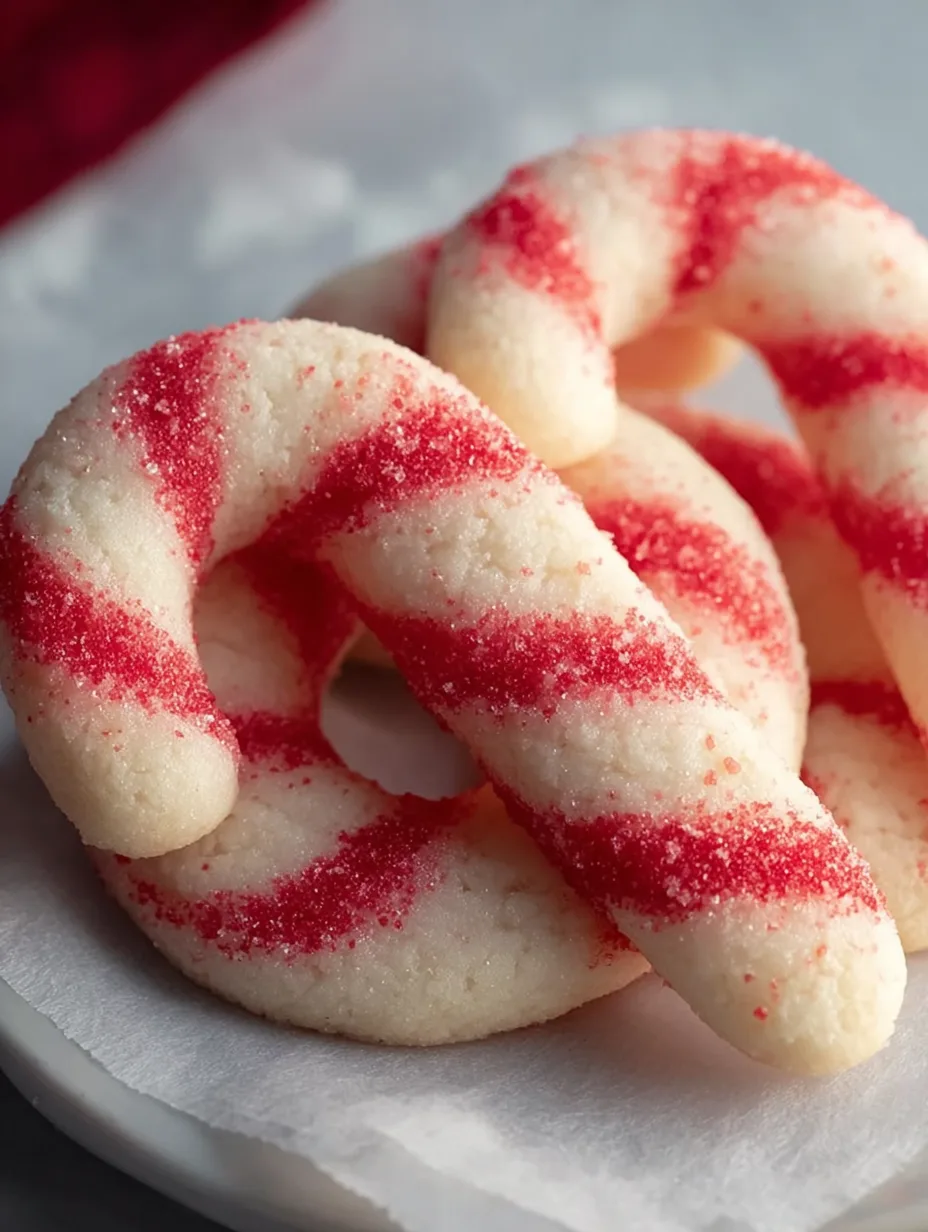
Buttery, crisp, and lightly sweet with a hint of peppermint, Candy Cane Cookies capture the magic of the holidays in every bite. Their iconic red-and-white swirl and delicate crunch make them a standout on any festive dessert table. These classic peppermint cookies not only look beautiful but also deliver a nostalgic flavor that instantly feels cozy and celebratory. Whether you bake them for gifting or family gatherings, they never fail to impress. You’ll learn how to shape, flavor, and bake these treats perfectly every time.
Why You’ll Love This Recipe
There’s something undeniably charming about Candy Cane Cookies. Their twisted design feels playful, yet elegant enough for holiday cookie trays and cookie exchanges. When you bite into one, you’ll notice a gentle crispness on the outside that gives way to a tender, buttery center. The cool peppermint flavor balances the sweetness beautifully, creating a refreshing finish.
This recipe keeps things simple. You don’t need complicated tools or advanced skills to achieve that bakery-style look. The dough comes together quickly, and shaping becomes fun once you get the hang of it. Kids love helping twist the ropes into candy cane shapes, making this a perfect family baking activity.
These festive Christmas cookies also hold their shape well in the oven. The contrast between the vanilla dough and peppermint dough creates that signature red-and-white swirl that makes these holiday candy cane treats so visually striking.
Ingredients
To make about 24 Candy Cane Cookies, gather the following:
-
1 cup (226 g) unsalted butter, softened
-
1 cup (200 g) granulated sugar
-
1 large egg
-
1½ teaspoons vanilla extract
-
½ teaspoon peppermint extract
-
2¾ cups (345 g) all-purpose flour
-
½ teaspoon salt
-
½ teaspoon baking powder
-
Red gel food coloring
The butter provides richness and a tender crumb. Granulated sugar adds sweetness and helps create crisp edges. Peppermint extract delivers the signature holiday flavor, while vanilla balances the cool mint notes. Red gel food coloring creates vibrant contrast without thinning the dough.
Pro Tips for Perfect Results
Perfecting Candy Cane Cookies depends on technique. Follow these key tips for bakery-quality results.
First, chill the dough. After dividing and coloring it, wrap each portion tightly and refrigerate for at least one hour. Cold dough prevents spreading and makes shaping much easier.
Second, roll evenly sized ropes. Measure roughly one tablespoon of dough per rope and roll gently from the center outward. Keep the thickness consistent so both colors bake evenly.
Third, twist gently. Press the white and red ropes together lightly before twisting. Over-twisting blends the colors and reduces the sharp contrast. Aim for a soft spiral rather than a tight braid.
These simple steps ensure your holiday peppermint cookies bake evenly and maintain their classic shape.
Instructions
Step 1: Cream the Butter and Sugar
Place softened butter and granulated sugar in a large mixing bowl. Beat until light and fluffy, about 2–3 minutes. This step builds structure and ensures a tender texture.
Step 2: Add Egg and Extracts
Mix in the egg, vanilla extract, and peppermint extract. Blend until smooth. The dough should look creamy and slightly glossy.
Step 3: Combine Dry Ingredients
In a separate bowl, whisk together flour, salt, and baking powder. Gradually add the dry mixture to the wet ingredients. Stir until a soft dough forms. Avoid overmixing to keep the cookies tender.
Step 4: Divide and Color
Divide the dough evenly into two portions. Leave one portion plain. Add red gel food coloring to the second half and knead gently until the color distributes evenly. Wrap both portions in plastic wrap and refrigerate for one hour.
Step 5: Shape the Ropes
Preheat your oven to 375°F (190°C) and line baking sheets with parchment paper. Take small portions of each dough color and roll them into 5-inch ropes. Place one red rope and one white rope side by side.
Step 6: Twist and Form
Press the ropes lightly together and twist them gently. Curve the top slightly to create a candy cane shape. Place each cookie about 2 inches apart on the baking sheet.
Step 7: Bake
Bake for 8–10 minutes until the edges set but do not brown. The cookies should look firm yet pale. Allow them to cool on the baking sheet for 5 minutes before transferring to a wire rack.
Let them cool completely before serving or storing. The crisp texture develops as they cool.

Variations
You can easily customize Candy Cane Cookies to suit different tastes.
For a chocolate twist, dip the cooled ends in melted dark or white chocolate. Sprinkle crushed peppermint candies on top before the chocolate sets. This variation adds richness and extra crunch.
If you prefer a stronger mint flavor, add finely crushed peppermint candy to the dough. This creates subtle texture throughout the cookie.
For a gluten-free option, substitute a 1:1 gluten-free baking flour blend. Ensure it contains xanthan gum for proper structure. These festive peppermint cookies adapt beautifully without sacrificing flavor.
Storage and Serving Ideas
Store Candy Cane Cookies in an airtight container at room temperature for up to one week. Place parchment paper between layers to prevent sticking.
For longer storage, freeze baked cookies in a sealed container for up to three months. Thaw at room temperature before serving.
Serve them on a holiday cookie platter alongside sugar cookies and gingerbread. Wrap them in clear cellophane bags with ribbon for thoughtful edible gifts. Pair with hot cocoa or peppermint tea for a cozy winter treat. These classic Christmas cookies also look stunning arranged in a decorative tin for seasonal parties.
FAQs
Can I make the dough ahead of time?
Yes. Refrigerate the wrapped dough for up to 48 hours before shaping.
Why did my cookies spread too much?
The dough likely wasn’t chilled long enough. Cold dough helps maintain shape.
Can I use liquid food coloring?
Gel coloring works best. Liquid coloring can thin the dough and affect texture.
How do I prevent cracking while shaping?
Let chilled dough sit at room temperature for 5 minutes before rolling. This softens it slightly.
Can I double the recipe?
Absolutely. Candy Cane Cookies scale well and freeze beautifully, making them ideal for holiday baking sessions.
Conclusion
This Candy Cane Cookies recipe is comfort food at its finest — buttery, peppermint-kissed, and beautifully twisted into festive shapes. It’s the kind of dish that brings holiday cheer to your kitchen and makes cookie exchanges, family gatherings, and edible gifting feel extra special.
With their crisp edges, tender centers, and eye-catching red-and-white swirls, these cookies deliver both flavor and nostalgia in every bite. Once you master the simple twisting technique, you’ll find yourself baking them year after year as part of your holiday tradition.
Print
Candy Cane Cookies
- Total Time: 45 minutes
Description
Sweet, buttery, and perfectly pepperminty, these Candy Cane Cookies are the ultimate holiday showstopper. Their festive red and white twist makes every cookie tray instantly magical.
Ingredients
-
1 cup unsalted butter, softened
-
1 cup granulated sugar
-
1 large egg
-
1½ teaspoons vanilla extract
-
½ teaspoon peppermint extract
-
2¾ cups all-purpose flour
-
½ teaspoon salt
-
½ teaspoon baking powder
-
Red gel food coloring
Instructions
-
Cream softened butter and sugar together until light and fluffy.
-
Mix in egg, vanilla extract, and peppermint extract until smooth.
-
Whisk flour, salt, and baking powder in a separate bowl, then gradually combine with wet ingredients to form dough.
-
Divide dough in half and color one portion red. Wrap and refrigerate both portions for one hour.
-
Preheat oven to 375°F and line baking sheets with parchment paper.
-
Roll small portions of each dough into equal ropes, press together, and twist gently.
-
Shape into candy cane forms and place on prepared baking sheets.
-
Bake for 8 to 10 minutes until set but not browned. Cool before serving
- Prep Time: 15 minutes
- Cook Time: 30 minutes
- Category: cooking
- Cuisine: American