
Introduction
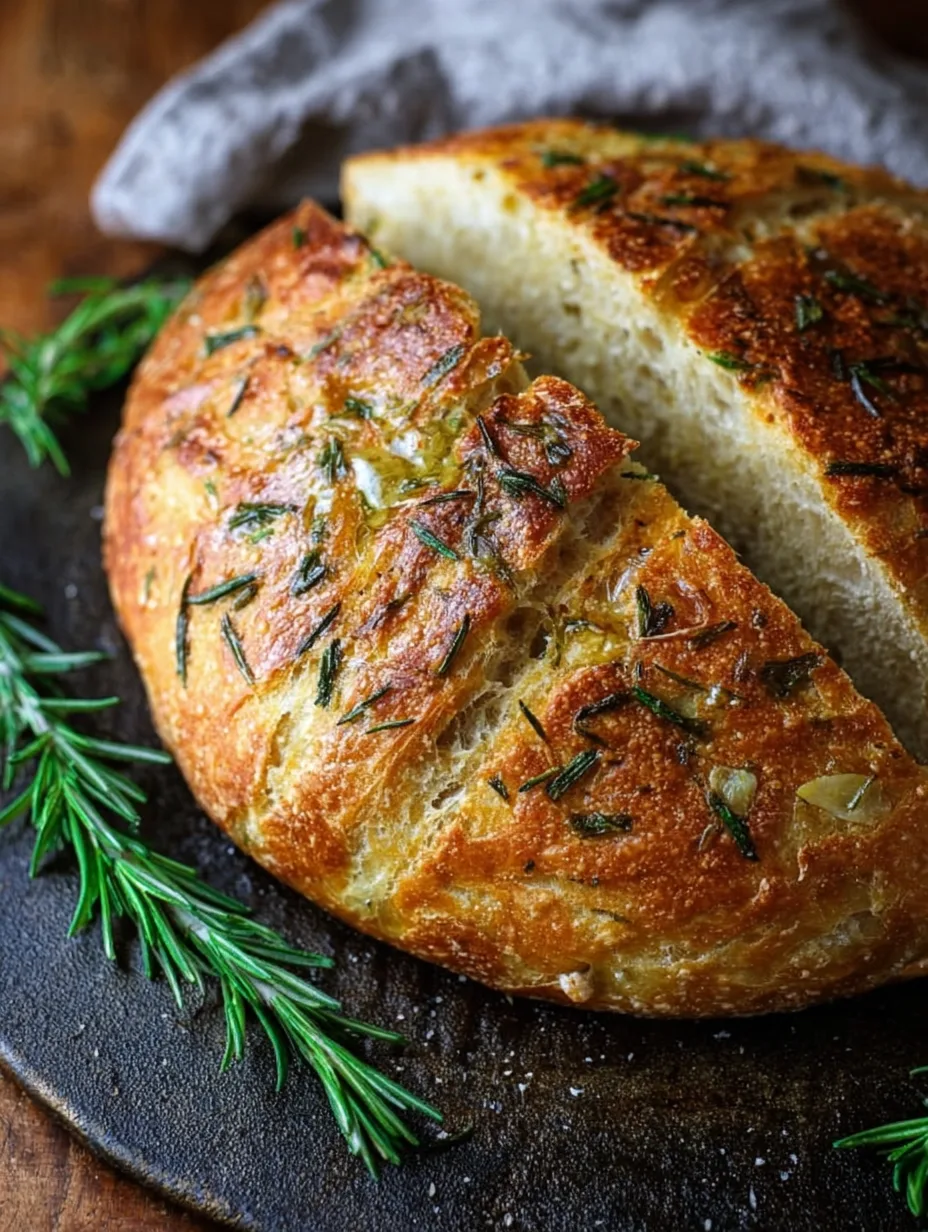
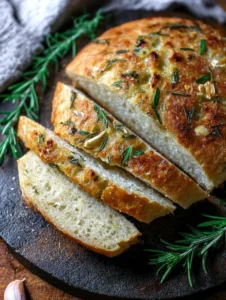
Imagine a loaf of bread with a golden, crispy crust that shatters delicately with every bite, revealing a soft, airy interior infused with fragrant rosemary and roasted garlic. No Knead Rosemary Garlic Bread is perfect for both novice bakers and seasoned pros who crave artisan flavors without hours of effort. This recipe transforms simple ingredients into a show-stopping loaf ideal for family dinners, cozy nights, or garlic pasta with bacon pairings. You’ll learn how to create bakery-quality bread with minimal hands-on time, unlocking the secrets to perfect crust and aromatic flavor.
Why You’ll Love This Recipe
No Knead Rosemary Garlic Bread combines ease, flavor, and texture in a way few breads can. The no-knead method eliminates intimidating steps, letting the dough slowly develop a chewy, open crumb. Fresh rosemary adds herbal depth while roasted garlic infuses the bread with a rich, savory aroma that fills your kitchen. The crust is satisfyingly crisp, creating a delightful contrast with the soft, fluffy center. Whether you tear it fresh from the oven, pair it with olive oil dips, or serve alongside garlic pasta with bacon, every bite delivers comfort and elegance. This recipe proves that artisan-style bread doesn’t need hours of kneading or complicated techniques.
Ingredients
-
3 cups (360 g) all-purpose flour
-
1 ½ tsp salt
-
½ tsp instant yeast
-
1 ½ cups (360 ml) warm water
-
2 tbsp fresh rosemary, finely chopped
-
4 cloves garlic, roasted and mashed
-
1 tbsp olive oil (optional, for brushing)
-
Extra flour for dusting
This simple list uses pantry staples while allowing the rosemary and garlic to shine. Roasting garlic softens its pungency, creating a sweet, aromatic filling for every bite.
Pro Tips
-
Use Room Temperature Water: Warm water activates yeast without killing it. Too hot, and the dough won’t rise properly; too cold, and it may take much longer.
-
Don’t Skip the Rest: Letting the dough rest for 12–18 hours develops flavor and gives the bread its open, airy crumb. Patience is key for the perfect texture.
-
Preheat Your Dutch Oven: Baking in a preheated covered pot traps steam, creating a crisp crust reminiscent of professional bakeries.
Extra tip: sprinkle rosemary on top just before baking for an eye-catching finish and intensified aroma.
Instructions
Step 1: Mix the Dough
In a large bowl, combine flour, salt, and yeast. Add warm water and mix until a shaggy dough forms. Stir in roasted garlic and chopped rosemary, ensuring even distribution. No kneading required; just fold until all ingredients are hydrated.
Step 2: First Rise
Cover the bowl with plastic wrap or a damp towel and let the dough rest at room temperature for 12–18 hours. The dough should double in size and have a bubbly texture. Longer fermentation enhances flavor.
Step 3: Shape the Dough
Generously flour a work surface. Gently scrape the dough onto it and fold it a few times to form a round loaf. Avoid overworking; you want to maintain air pockets.
Step 4: Preheat the Oven
Place a Dutch oven with its lid in the oven and preheat to 450°F (230°C) for at least 30 minutes. A hot, covered pot ensures a crisp crust.
Step 5: Bake the Bread
Carefully remove the Dutch oven. Place the dough inside, cover, and bake for 30 minutes. Remove the lid and bake an additional 15–20 minutes until the crust is golden brown and crackly.
Step 6: Cool and Serve
Transfer the bread to a wire rack and let it cool for at least 30 minutes before slicing. This helps set the crumb. Brush with olive oil for extra shine and aroma.
Variations
-
Cheesy Rosemary Garlic Bread: Sprinkle grated parmesan or cheddar into the dough before baking for a cheesy twist.
-
Whole Wheat Version: Replace half of the all-purpose flour with whole wheat flour for a nuttier flavor and heartier texture.
-
Vegan Adaptation: Skip the olive oil brushing or use a plant-based oil alternative; all other ingredients are naturally vegan.
Storage and Serving
Store No Knead Rosemary Garlic Bread in a paper bag at room temperature for up to 3 days to maintain the crust’s crispiness. For longer storage, slice and freeze; toast slices directly from frozen for best results. Serve it alongside soups, salads, or pasta dishes. For a luxurious snack, drizzle with olive oil, spread roasted garlic butter, or pair with garlic pasta with bacon for a complete meal.
FAQs
Q1: Can I make this bread without a Dutch oven?
Yes, use a heavy, oven-safe pot or a baking sheet with a small pan of water to create steam for a crisp crust.
Q2: Why is my bread dense?
Underproofing or cold water can prevent proper rise. Ensure the dough doubles in size and water is warm.
Q3: Can I use dried rosemary instead of fresh?
Yes, but fresh rosemary provides a brighter flavor. If using dried, reduce the amount by half.
Q4: How long will the bread stay fresh?
At room temperature in a paper bag, it lasts 2–3 days. Freezing extends shelf life up to 3 months.
Q5: Can I add other flavors?
Absolutely! Sun-dried tomatoes, olives, or caramelized onions complement rosemary and garlic beautifully.
Conclusion
This No Knead Rosemary Garlic Bread is comfort food at its finest — a rustic, aromatic loaf with a perfect balance of crispy crust and tender, herb-infused crumb. It’s the kind of dish that elevates weeknight dinners, impresses guests, and pairs effortlessly with soups, salads, or a creamy plate of garlic pasta with bacon. Baking this bread proves that artisan flavors can be achieved easily at home, creating unforgettable meals with minimal effort.
Print
No Knead Rosemary Garlic Bread
- Total Time: 45 minutes
Description
Discover the magic of bakery-style bread at home with this easy no knead rosemary garlic loaf. Crispy on the outside, soft and fragrant on the inside, it’s perfect for any meal.
Ingredients
-
3 cups (360 g) all-purpose flour
-
1 ½ tsp salt
-
½ tsp instant yeast
-
1 ½ cups (360 ml) warm water
-
2 tbsp fresh rosemary, finely chopped
-
4 cloves garlic, roasted and mashed
-
1 tbsp olive oil (optional, for brushing)
-
Extra flour for dusting
Instructions
-
In a large bowl, combine flour, salt, and yeast. Add warm water, mix until shaggy, and fold in roasted garlic and rosemary.
-
Cover and let the dough rest 12–18 hours at room temperature until doubled and bubbly.
-
Flour a work surface and gently fold the dough into a round loaf.
-
Preheat a Dutch oven at 450°F (230°C) for at least 30 minutes.
-
Carefully place the dough into the Dutch oven, cover, and bake 30 minutes. Remove lid and bake 15–20 more minutes until golden brown.
-
Cool on a wire rack for 30 minutes before slicing. Brush with olive oil if desired.
Notes
Use very ripe bananas for natural sweetness and better moisture.
Avoid overmixing the batter to keep the muffins soft and fluffy.
Store muffins in an airtight container or freeze for easy meal prep breakfasts.
- Prep Time: 15 minutes
- Cook Time: 30 minutes
- Category: Breakfast
- Cuisine: American