
Introduction
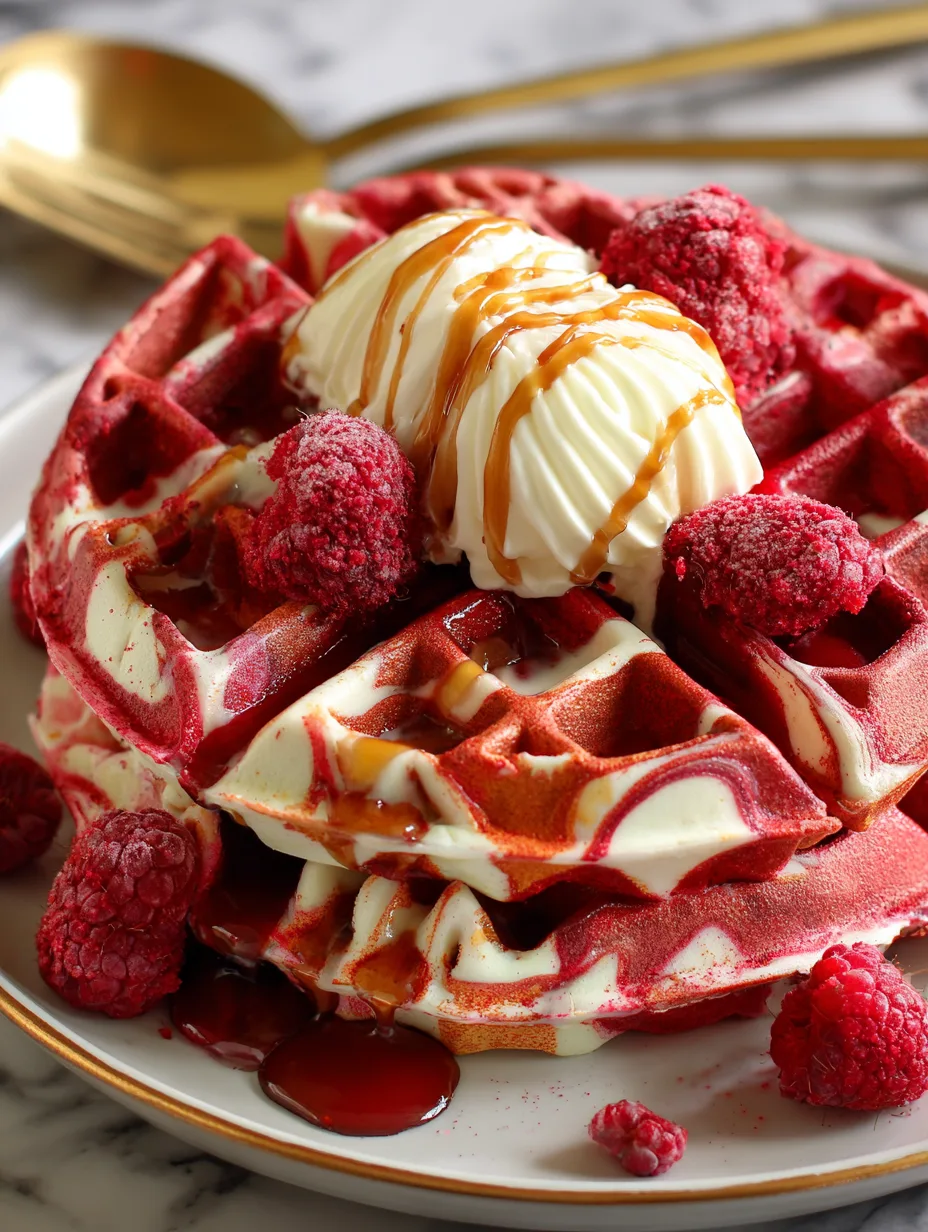
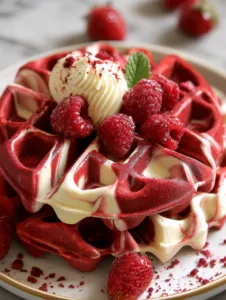
Crispy on the outside, fluffy on the inside, and beautifully swirled with vibrant red and creamy vanilla, Red Velvet Marble Waffles bring a stunning brunch twist to a classic dessert flavor. These waffles combine the rich cocoa notes of red velvet with traditional buttery waffle batter for a breakfast that feels like a celebration. This Red Velvet Marble Waffles recipe is special because it balances decadence with simplicity, giving you eye-catching results with minimal effort. You’ll learn how to create perfect swirls, achieve an irresistible texture, and serve them like a pro.
Why You’ll Love This Recipe
You’ll love Red Velvet Marble Waffles because they feel indulgent without becoming overly sweet. Each bite delivers a perfect mix of textures: crispy edges that give way to a tender, velvety center. The classic cocoa-vanilla pairing makes these waffles familiar yet exciting, especially when the red velvet batter forms stunning marbled patterns. This recipe is easy enough for weekday breakfasts and impressive enough for holidays or brunch gatherings. The swirls look gourmet but require zero complicated steps, making the process as enjoyable as the final dish. The waffles also pair beautifully with cream cheese glaze, fresh berries, or honey butter, giving you endless opportunities to personalize your plate. Whether you love creative brunch ideas, crave dessert-inspired breakfasts, or want something visually striking, these Red Velvet Marble Waffles never disappoint.
Ingredients
You won’t need anything fancy to make Red Velvet Marble Waffles, but each ingredient plays an important role. You’ll use 2 cups (240 g) all-purpose flour for structure, 2 tablespoons (25 g) granulated sugar for balanced sweetness, and 2 teaspoons (8 g) baking powder to help create that fluffy interior. A pinch of salt enhances flavor, while 1 ½ cups (360 ml) whole milk gives the batter richness. Two large eggs provide stability, and 4 tablespoons (56 g) melted butter add depth and prevent dryness. For the red velvet portion, you’ll mix in 2 tablespoons (15 g) unsweetened cocoa powder, 1 teaspoon (5 ml) red food coloring, and 1 teaspoon (5 ml) vanilla extract. These ingredients create the signature color and flavor that make the marble pattern stand out. A short ingredient list, but packed with character.
Pro Tips
Mastering Red Velvet Marble Waffles comes down to three simple techniques. First, avoid overmixing the batter. Gently whisk until just combined — a few lumps help keep the waffles tender. Second, don’t rush the swirling. When you add dollops of red velvet batter over the vanilla base, use a toothpick or butter knife to create soft, curving patterns instead of sharp streaks. This preserves both color contrast and texture. Finally, allow your waffle iron to fully preheat before pouring the batter. A hot surface guarantees crisp, golden edges while helping the marble effect stay defined. These tips ensure your waffles cook evenly, look beautiful, and maintain a dreamy, melt-in-your-mouth center.
Instructions
Step 1
In a large bowl, whisk together the flour, sugar, baking powder, and salt. This creates an even base and distributes the leavening agent so your Red Velvet Marble Waffles rise properly when cooking.
Step 2
In a separate bowl, whisk the milk, eggs, and melted butter until smooth. For the best texture, make sure the butter is warm but not hot so it blends easily without scrambling the eggs.
Step 3
Pour the wet ingredients into the dry mixture and gently fold everything together. Stop as soon as the batter is combined. Overmixing leads to dense waffles instead of airy ones. Your goal is a batter that flows but still looks slightly lumpy.
Step 4
Transfer one-third of the batter to a smaller bowl. Add the cocoa powder, red food coloring, and vanilla extract, whisking just until the mixture turns silky and bright. This will become the red velvet swirl that gives your Red Velvet Marble Waffles their signature design and flavor.
Step 5
Preheat your waffle iron until hot. Lightly grease it with butter or nonstick spray. For perfect marbling, scoop a layer of vanilla batter onto the iron, then add a few spoonfuls of red velvet batter on top.
Step 6
Use a toothpick to gently swirl the batters together with curved motions. Avoid mixing too much or the colors will blend instead of marbling. Close the waffle iron and cook until the waffle turns golden, crisp, and aromatic.
Step 7
Repeat with the remaining batter, marbling each waffle individually. As you get more comfortable with the swirling technique, your designs will become even prettier. Serve warm with cream cheese glaze, warm maple syrup, or toppings of your choice.
Variations
You can customize Red Velvet Marble Waffles in several fun and flavorful ways. For a lighter option, swap whole milk for buttermilk to add tang and enhance the red velvet flavor. If you want a sweeter, dessert-style waffle, add chocolate chips to the red velvet batter for melty pockets of richness. You can also create a gluten-free version by using a 1:1 gluten-free baking flour blend — the marbling effect still works beautifully. For those who love festive breakfasts, sprinkle crushed peppermint over the cooked waffles for a winter-themed twist. Each variation keeps the striking marble effect intact while making the dish your own.
Storage/Serving
Store leftover Red Velvet Marble Waffles in an airtight container for up to 3 days in the refrigerator. To reheat, pop them into a toaster or warm them in an oven at 350°F (175°C) for 5 minutes so the edges crisp up again. These waffles also freeze well; place cooled waffles in a zip-top bag with parchment paper between each piece. They’ll stay fresh for up to 2 months. When serving, pair them with whipped cream, cream cheese frosting, or even fresh strawberries for a burst of brightness. You can also serve them with honey-cinnamon butter or a drizzle of white chocolate for an extra-decadent touch. Each serving option enhances the beautiful marbling and rich flavor profile.
FAQs
1. Why aren’t my waffles crispy?
Your waffle iron may not be hot enough. Always preheat it fully before adding the batter.
2. Can I make these waffles ahead of time?
Yes, Red Velvet Marble Waffles freeze and reheat extremely well, making them great for meal prep.
3. Can I use gel food coloring instead of liquid?
Absolutely. Gel food coloring is more vibrant, so you may need less to achieve the red velvet look.
4. Can I substitute buttermilk for whole milk?
Yes, buttermilk adds tang and produces an even fluffier texture.
5. How do I prevent the batter from blending instead of marbling?
Use a gentle swirling motion and avoid overmixing once the colors touch.
Conclusion
This Red Velvet Marble Waffles is comfort food at its finest — warm, buttery, and beautifully swirled with vibrant red velvet charm. It’s the kind of dish that elevates brunch, brightens special mornings, and turns simple ingredients into a plate of edible art.
Print
Red Velvet Marble Waffles
- Total Time: 40mins
Description
Give your brunch a stunning upgrade with these Red Velvet Marble Waffles. Swirled, vibrant, and irresistibly fluffy, they turn any morning into a celebration.
Ingredients
-
2 cups (240 g) all-purpose flour
-
2 tbsp (25 g) granulated sugar
-
2 tsp (8 g) baking powder
-
1/2 tsp salt
-
1 1/2 cups (360 ml) whole milk
-
2 large eggs
-
4 tbsp (56 g) melted butter
-
2 tbsp (15 g) unsweetened cocoa powder
-
1 tsp (5 ml) red food coloring
-
1 tsp (5 ml) vanilla extract
Instructions
- Prep Time: 15 mins
- Cook Time: 25mins