
Introduction
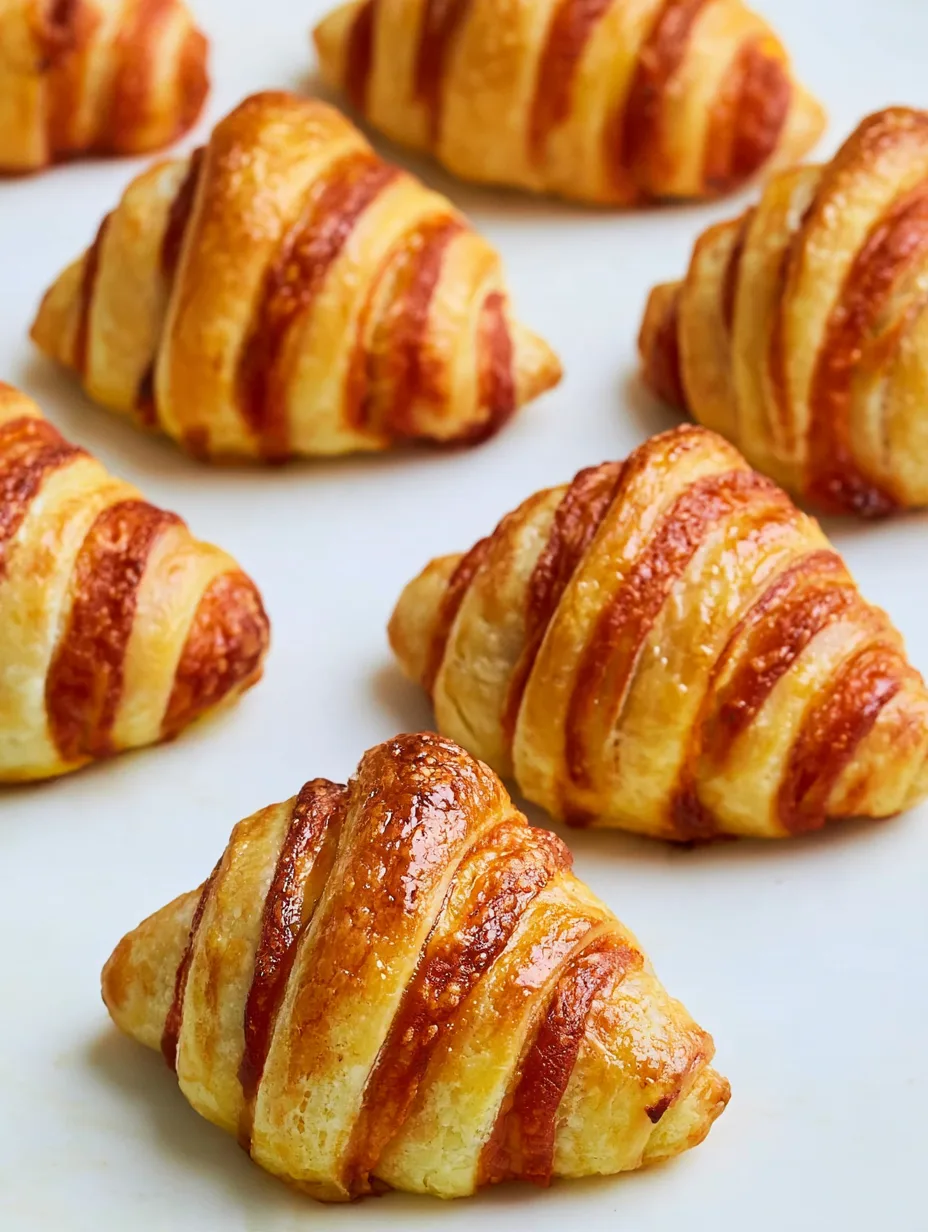
Warm, buttery, flaky, and filled with cozy pumpkin spice, Mini Pumpkin Pie Crescent Rolls bring the comforting flavor of classic pumpkin pie into a fun handheld treat. Each crescent roll bakes into a golden pastry with a creamy pumpkin center, making every bite soft inside and delicately crisp around the edges. They come together quickly with refrigerated crescent dough, so you can enjoy homemade fall flavor without making a traditional pie crust. They are perfect for breakfast, dessert, holiday gatherings, or an easy weekend baking project. You’ll learn how to make them, customize them, and serve them beautifully.
Why You’ll Love This Recipe
There is something especially satisfying about turning classic pumpkin pie flavors into bite-sized pastries. Mini Pumpkin Pie Crescent Rolls deliver that familiar combination of pumpkin, cinnamon, nutmeg, and brown sugar in a much simpler format.
The texture makes these treats especially irresistible. The outside becomes golden and lightly crisp while the pumpkin filling stays smooth, creamy, and tender. That contrast gives every bite a delicious combination of flaky pastry and rich pumpkin spice filling.
You also do not need advanced baking skills. Refrigerated crescent roll dough eliminates the need to mix, chill, and roll homemade pastry. Simply prepare the filling, roll it into the dough, and bake.
These pumpkin crescent rolls also work for several occasions. Serve them at a fall brunch, add them to a Thanksgiving dessert table, or make a small batch when you want something sweet with your afternoon coffee. Their miniature size makes them easy to grab and share, too.
Ingredients
For the pumpkin filling, you will need 1/2 cup (120 g) pumpkin puree, preferably pure pumpkin rather than pumpkin pie filling. Add 2 tablespoons (25 g) packed brown sugar for sweetness, 1/2 teaspoon ground cinnamon, 1/4 teaspoon ground nutmeg, 1/4 teaspoon ground ginger, and 1/2 teaspoon vanilla extract for warm flavor.
Use 1 package (8 ounces or 226 g) refrigerated crescent roll dough. Separate the dough into individual triangles before filling.
You will also need 2 tablespoons (28 g) melted unsalted butter for brushing the pastries. For a finishing touch, combine 1 tablespoon (12 g) granulated sugar with 1/2 teaspoon cinnamon and sprinkle it over the rolls before baking.
Avoid adding too much filling. A small amount keeps the rolls neat and helps the dough bake evenly.
Pro Tips
1. Keep the dough cold. Refrigerated crescent dough becomes easier to handle when it stays chilled. If your kitchen feels warm, work with half the dough at a time and return the rest to the refrigerator.
2. Use a light layer of filling. It may seem tempting to add extra pumpkin mixture, but too much filling can squeeze out during rolling. Spread a thin layer over each triangle while leaving a little space around the edges.
3. Roll from the wide end. Start at the broadest part of each crescent triangle and roll toward the pointed tip. Tuck the tip underneath slightly so it stays secure during baking.
For the best golden finish, brush the tops lightly with melted butter rather than soaking them. A modest coating encourages browning while keeping the pastry flaky. Watch the rolls closely near the end of baking because smaller pastries can brown quickly.
Step-by-Step Instructions
Step 1: Prepare the filling.
Preheat your oven to 375°F (190°C). Line a baking sheet with parchment paper or lightly grease it. In a small bowl, stir together the pumpkin puree, brown sugar, cinnamon, nutmeg, ginger, and vanilla. Mix until the filling looks smooth and evenly combined.
Step 2: Prepare the crescent dough.
Open the refrigerated crescent roll package and carefully unroll the dough. Separate it along the perforated lines into eight triangles. If any perforations look weak, gently press them back together before adding the filling.
Step 3: Add the pumpkin mixture.
Place one dough triangle on your work surface with the wide end closest to you. Spread about 1 tablespoon of pumpkin filling over the center of the dough. Keep the filling away from the outer edges so it does not spill while you roll.
Step 4: Roll the crescents.
Starting at the wide end, gently roll each triangle toward the pointed tip. Do not squeeze the dough too tightly. Place each finished roll on the prepared baking sheet with the pointed tip tucked underneath.
Step 5: Add the buttery topping.
Brush each crescent lightly with melted butter. In a small bowl, mix the granulated sugar and cinnamon. Sprinkle a little cinnamon sugar over each roll for extra sweetness and a delicate crisp topping.
Step 6: Bake until golden.
Place the baking sheet in the preheated oven and bake for about 10 to 13 minutes, or until the crescent dough turns puffed and golden brown. Keep an eye on them during the final few minutes because oven temperatures can vary.
Step 7: Cool and serve.
Remove the rolls from the oven and let them cool on the baking sheet for several minutes. The filling will be hot immediately after baking, so give it time to settle. Serve the pastries warm or at room temperature.
For an extra-special presentation, dust the cooled rolls lightly with powdered sugar or serve them alongside whipped cream.
Variations
You can easily adapt Mini Pumpkin Pie Crescent Rolls to match your favorite fall flavors. For a richer version, add 2 tablespoons of softened cream cheese to the pumpkin mixture. The result creates a slightly tangy, cheesecake-inspired filling.
For a maple variation, replace half of the brown sugar with 1 tablespoon of pure maple syrup. Add a small pinch of extra cinnamon for a deeper flavor.
If you prefer a nutty dessert, sprinkle finely chopped pecans over the pumpkin filling before rolling the dough. Keep the pieces small so they do not tear the pastry.
For a dairy-free option, use a dairy-free crescent dough if available and replace the butter with melted plant-based butter. You can also reduce the sweetness by using less brown sugar and skipping the cinnamon-sugar topping.
These simple changes let you create different versions without changing the basic preparation method.
Storage and Serving
Store leftover Mini Pumpkin Pie Crescent Rolls in an airtight container in the refrigerator for up to 3 days. Because the filling contains pumpkin, refrigeration helps keep the pastries fresh and safe to enjoy.
To reheat them, place the rolls in a 325°F (165°C) oven for several minutes until warmed through. An air fryer also works well for reheating and can help restore some of the pastry’s crispness. Avoid overheating because the pumpkin filling can become very hot.
For serving, pair the rolls with freshly whipped cream and a light dusting of cinnamon. They also taste wonderful with vanilla ice cream for an easy fall dessert.
For breakfast or brunch, serve them beside coffee, chai tea, or warm apple cider. A small bowl of maple-flavored yogurt makes another delicious accompaniment.
FAQs
1. Can I use pumpkin pie filling instead of pumpkin puree?
You can, but pumpkin pie filling already contains sugar and spices. For better control over flavor, pure pumpkin puree works best.
2. Can I prepare these ahead of time?
Yes. You can assemble the rolls several hours ahead and refrigerate them until you are ready to bake. Keep them covered so the dough does not dry out.
3. Why did my pumpkin filling leak out?
The most common reason is using too much filling. Spread a thin layer and leave space around the edges before rolling.
4. Can I freeze the baked rolls?
Yes. Cool them completely, place them in a freezer-safe container, and freeze for up to 2 months. Thaw them in the refrigerator before reheating.
5. Can I make them without the cinnamon-sugar topping?
Absolutely. The pumpkin filling already provides plenty of warm spice. You can simply brush the dough with butter and bake.
This Mini Pumpkin Pie Crescent Rolls recipe is comfort food at its finest — flaky, buttery pastry wrapped around creamy pumpkin pie filling and finished with a warm cinnamon-sugar touch. It’s the kind of dish that makes ordinary fall mornings feel special and gives holiday dessert tables an easy homemade treat everyone can enjoy. The simple crescent dough keeps preparation quick, while the pumpkin spice filling creates all the cozy flavor you expect from a classic autumn dessert. Make a batch for brunch, Thanksgiving, a family gathering, or whenever you want a little taste of pumpkin pie without baking an entire pie.
Print
Mini Pumpkin Pie Crescent Rolls
- Total Time: 45
Description
These Mini Pumpkin Pie Crescent Rolls are the easiest way to enjoy cozy pumpkin pie flavor in a flaky, golden bite. They are perfect for fall mornings, holiday gatherings, and effortless seasonal desserts.
Ingredients
- 1/2 cup (120 g) pumpkin puree
- 2 tablespoons (25 g) packed brown sugar
- 1/2 teaspoon ground cinnamon
- 1/4 teaspoon ground nutmeg
- 1/4 teaspoon ground ginger
- 1/2 teaspoon vanilla extract
- 1 package (8 oz or 226 g) refrigerated crescent roll dough
- 2 tablespoons (28 g) unsalted butter, melted
- 1 tablespoon (12 g) granulated sugar
- 1/2 teaspoon ground cinnamon
Instructions
- Preheat oven to 375°F (190°C) and line a baking sheet with parchment paper.
- Mix pumpkin puree, brown sugar, cinnamon, nutmeg, ginger, and vanilla until smooth.
- Separate crescent dough into 8 triangles.
- Spread about 1 tablespoon of pumpkin filling over the center of each triangle, leaving the edges clear.
- Roll each triangle from the wide end toward the pointed tip.
- Place the rolls on the prepared baking sheet with the pointed tips tucked underneath.
- Brush each roll lightly with melted butter.
- Mix granulated sugar with cinnamon and sprinkle over the rolls.
- Bake for 10 to 13 minutes, or until puffed and golden brown.
- Cool for several minutes before serving.
- Cuisine: American