
Introduction
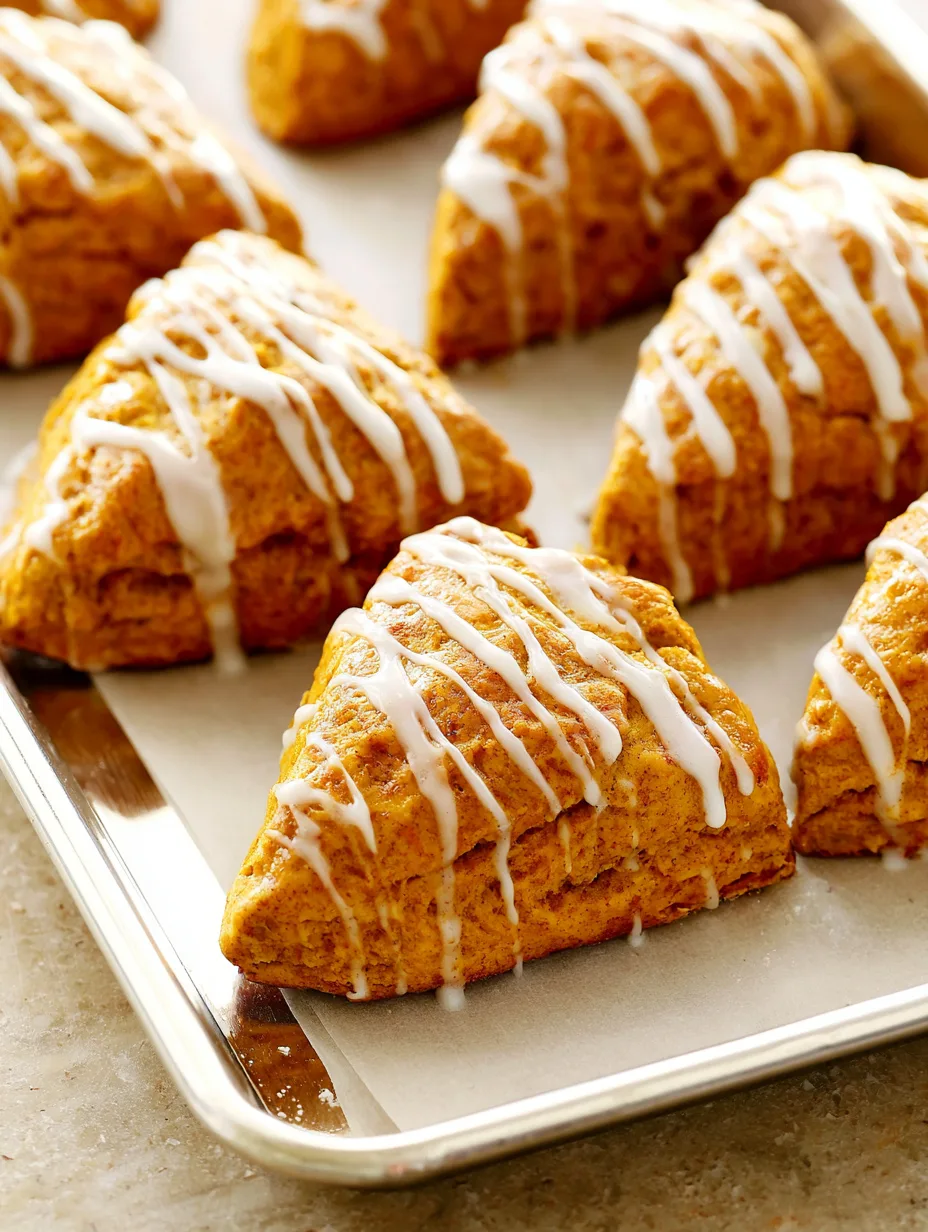
Warm, buttery, and wonderfully spiced, Pumpkin Scones bring the cozy flavors of fall straight to your kitchen. Each tender scone combines rich pumpkin, cinnamon, nutmeg, and a touch of brown sugar for a bakery-style treat with crisp golden edges and a soft center. They make an irresistible breakfast alongside coffee, but they also shine as an afternoon snack or simple dessert. Best of all, you can prepare them with everyday ingredients and bake them in under 25 minutes. You’ll learn how to make tender, flavorful scones that taste freshly baked from your favorite café.
Why You’ll Love This Recipe
These Pumpkin Scones deliver everything you want from a homemade fall pastry. The outside develops a lightly crisp, golden crust while the inside stays soft, tender, and pleasantly crumbly. Pumpkin adds moisture and subtle sweetness without making the scones heavy, while warm spices create that familiar autumn aroma.
You’ll also love how simple the recipe feels. You don’t need special equipment or complicated techniques. A mixing bowl, pastry cutter or fork, and baking sheet handle nearly everything.
The contrast in textures makes each bite especially satisfying. You get crisp edges, a tender center, and a delicate buttery finish. A simple vanilla glaze adds another layer of sweetness without overwhelming the pumpkin flavor.
These scones also work beautifully for weekend breakfasts, fall brunches, holiday gatherings, or casual coffee dates at home. Bake a batch when you want something comforting, fragrant, and homemade without spending hours in the kitchen.
Ingredients
For these Pumpkin Scones, use cold butter and pure pumpkin puree for the best texture and flavor. Cold butter creates tiny pockets of richness throughout the dough as the scones bake.
- 2 cups (250 g) all-purpose flour
- 1/3 cup (67 g) packed light brown sugar
- 1 1/2 teaspoons baking powder
- 1/2 teaspoon baking soda
- 1/2 teaspoon salt
- 1 teaspoon ground cinnamon
- 1/2 teaspoon ground nutmeg
- 1/4 teaspoon ground ginger
- 1/4 teaspoon ground cloves
- 6 tablespoons (85 g) cold unsalted butter, cubed
- 1/2 cup (120 g) pumpkin puree
- 1 large egg
- 1 teaspoon vanilla extract
For the glaze:
- 1 cup (120 g) powdered sugar
- 2 tablespoons (30 ml) milk
- 1/2 teaspoon vanilla extract
Use pure pumpkin puree rather than pumpkin pie filling because pie filling contains added sugar and spices.
Pro Tips
First, keep your butter cold. Warm butter blends too easily into the flour, which can make the finished scones dense instead of flaky. Cut the cold butter into small cubes, then work it into the dry ingredients until you see pea-sized pieces throughout the mixture.
Second, avoid overmixing the dough. Once you add the wet ingredients, stir just until everything comes together. A few dry crumbs are fine. You can gently bring them together with your hands on a lightly floured surface.
Third, chill the shaped dough before baking if your kitchen feels warm. Ten to fifteen minutes in the refrigerator helps the butter firm up and gives the scones a better rise. For especially tall scones, shape the dough into a thick round rather than flattening it too much.
Finally, use a sharp knife to cut the dough. Press straight down instead of sawing back and forth. This keeps the layers intact and helps the scones rise evenly in the oven.
Instructions
Step 1: Prepare the oven and baking sheet.
Preheat your oven to 400°F (200°C). Line a large baking sheet with parchment paper. This prevents sticking and makes cleanup quick. Set the pan aside while you prepare the dough.
Step 2: Mix the dry ingredients.
Add the flour, brown sugar, baking powder, baking soda, salt, cinnamon, nutmeg, ginger, and cloves to a large bowl. Whisk everything together thoroughly so the spices and leavening agents distribute evenly.
Step 3: Cut in the butter.
Add the cold cubed butter. Use a pastry cutter, two forks, or your fingertips to work the butter into the flour mixture. Stop when the mixture looks crumbly and contains several pea-sized pieces of butter. Those little pieces help create a tender, flaky texture.
Step 4: Combine the wet ingredients.
In a separate bowl, whisk together the pumpkin puree, egg, and vanilla extract until smooth. The pumpkin should blend evenly with the egg for a consistent dough.
Step 5: Bring the dough together.
Pour the pumpkin mixture into the dry ingredients. Stir gently with a wooden spoon or spatula until a shaggy dough forms. Do not keep stirring once the flour disappears. Overworking the dough can make the scones tough.
Step 6: Shape the dough.
Transfer the dough to a lightly floured surface. Gently pat it into a round about 1 inch (2.5 cm) thick. If the dough feels sticky, dust the surface and your hands lightly with flour rather than adding a large amount directly to the dough.
Step 7: Cut the scones.
Use a sharp knife or bench scraper to cut the dough into 8 wedges. Arrange them on the prepared baking sheet, leaving a little space between each piece.
Step 8: Chill and bake.
Place the baking sheet in the refrigerator for 10 to 15 minutes. Then bake for 18 to 22 minutes, or until the edges turn lightly golden and the centers look set. Avoid overbaking, because the scones continue cooking slightly as they cool.
Step 9: Cool and glaze.
Let the scones cool on the baking sheet for about 10 minutes. Whisk the powdered sugar, milk, and vanilla together until smooth. Drizzle the glaze over the slightly warm scones. Let it set for a few minutes before serving.

Variations
You can easily customize these Pumpkin Scones for different flavors and occasions. For a classic autumn twist, add 1/2 cup (60 g) of chopped pecans or walnuts to the dough. Their crunch creates a delicious contrast with the tender pumpkin center.
For extra chocolate flavor, fold in 1/2 cup (85 g) of mini chocolate chips. Chocolate chips pair naturally with pumpkin and make the scones especially appealing for kids.
You can also create a pumpkin spice version by replacing the individual spices with 2 teaspoons of your favorite pumpkin pie spice blend.
For a dairy-free adaptation, use plant-based butter and your preferred unsweetened dairy-free milk in the glaze. For a slightly less sweet option, skip the glaze and dust the cooled scones lightly with powdered sugar.
Storage and Serving
Store leftover Pumpkin Scones in an airtight container at room temperature for up to 2 days. If you want to keep them longer, refrigerate them for up to 5 days. Warm individual scones in the microwave for about 10 to 15 seconds before serving to restore their soft texture.
For longer storage, freeze unglazed scones in a freezer-safe container for up to 2 months. Thaw them at room temperature, then warm them in a 300°F (150°C) oven until heated through. Add fresh glaze after reheating.
Serve them warm with coffee, tea, or hot apple cider. They also make a lovely addition to a fall brunch spread alongside scrambled eggs, fresh fruit, or yogurt. For dessert, serve one with whipped cream or a small scoop of vanilla ice cream.
FAQs
Can I use homemade pumpkin puree?
Yes. Homemade puree works well as long as it has a thick consistency. Excess moisture can make the dough sticky, so drain watery puree before using it.
Why are my scones dry?
Overbaking or adding too much flour usually causes dry scones. Measure flour carefully and bake only until the edges turn lightly golden.
Can I make the dough ahead of time?
Yes. Shape the dough, cover it tightly, and refrigerate it overnight. Bake the scones directly from the refrigerator, adding a few extra minutes if needed.
Can I freeze pumpkin scones?
Absolutely. Freeze baked, unglazed scones for up to 2 months. Thaw and warm them before adding glaze.
Can I make smaller scones?
Yes. Cut the dough into 10 or 12 smaller wedges. Reduce the baking time and start checking them around 14 minutes.
This Pumpkin Scones recipe is comfort food at its finest — tender, buttery pastries filled with cozy pumpkin flavor, warm spices, and a sweet vanilla glaze. It’s the kind of treat that turns an ordinary morning into a special fall breakfast, whether you’re enjoying a quiet cup of coffee or sharing a weekend brunch with family. Bake them when the weather cools, when guests arrive, or whenever you crave something homemade and warmly spiced. With crisp edges, soft centers, and irresistible autumn flavor, these scones are sure to become a seasonal favorite.
Print
Pumpkin Scones
- Total Time: 45
Description
These Pumpkin Scones are everything you want on a crisp fall morning, with tender centers, golden edges, warm spices, and a sweet vanilla glaze.
Ingredients
2 1/2 cups all-purpose flour
1/2 cup packed brown sugar
1 tablespoon baking powder
2 teaspoons ground cinnamon
2 teaspoons pumpkin pie spice
1/2 teaspoon fine sea salt
1/2 cup very cold salted butter, * diced or grated
3/4 cup pumpkin purée
1/3 cup buttermilk (or milk), plus extra for brushing
1 teaspoon vanilla extract
Vanilla Glaze Ingredients:
1/2 cup powdered sugar
2 to 3 teaspoons buttermilk (or milk)
1/2 teaspoon vanilla extract
optional: 1/4 teaspoon ground cinnamon, ginger or cardamom
Instructions
Combine dry ingredients. In a large mixing bowl, whisk together flour, brown sugar, baking powder, cinnamon, pumpkin pie spice and salt until evenly combined.
Cut in the butter. Add the diced butter and use a pastry cutter or two forks (or a food processor, see below) to cut the butter evenly into the dry ingredients until the mixture is crumbly and the butter forms no larger than pea-sized chunks.
Add in the wet ingredients. Add in the pumpkin purée, milk and vanilla extract. Then use a spatula to quickly and gently stir the mixture until no dry streaks remain. (Try to avoid over-mixing.)
Shape the scones. Turn the mixture out onto a flour-dusted surface and fold the dough over on itself a few times until it holds together and can form a ball. (The dough will be a bit sticky, so don’t worry.) Pat the dough down flat into an 8-inch circle. Then use a large knife or bench scraper to slice the dough into 8 equal-sized pie wedges. (You may need to wipe off your knife between slices if the dough is sticky.)
Chill. Transfer the wedges to a parchment-covered baking sheet, spacing them at least 2 inches apart. Then transfer the baking sheet to the freezer for 15 minutes or so while your oven heats. Heat the oven to 425°F.
Bake. Briefly brush the top of each scone with a bit of buttermilk. Then transfer the baking sheet to the oven and bake for 13-15 minutes or until the scones are lightly golden on top and cooked through. Transfer to a wire baking rack to cool.
Glaze. In a small bowl, whisk together the glaze ingredients until combined. (If the mixture seems too thin, add more powdered sugar.) Then once the scones have cooled a bit, brush or drizzle the glaze on top of the scones. Serve and enjoy!
- Prep Time: 15
- Cook Time: 20
- Category: Breakfast
- Cuisine: American