
Introduction
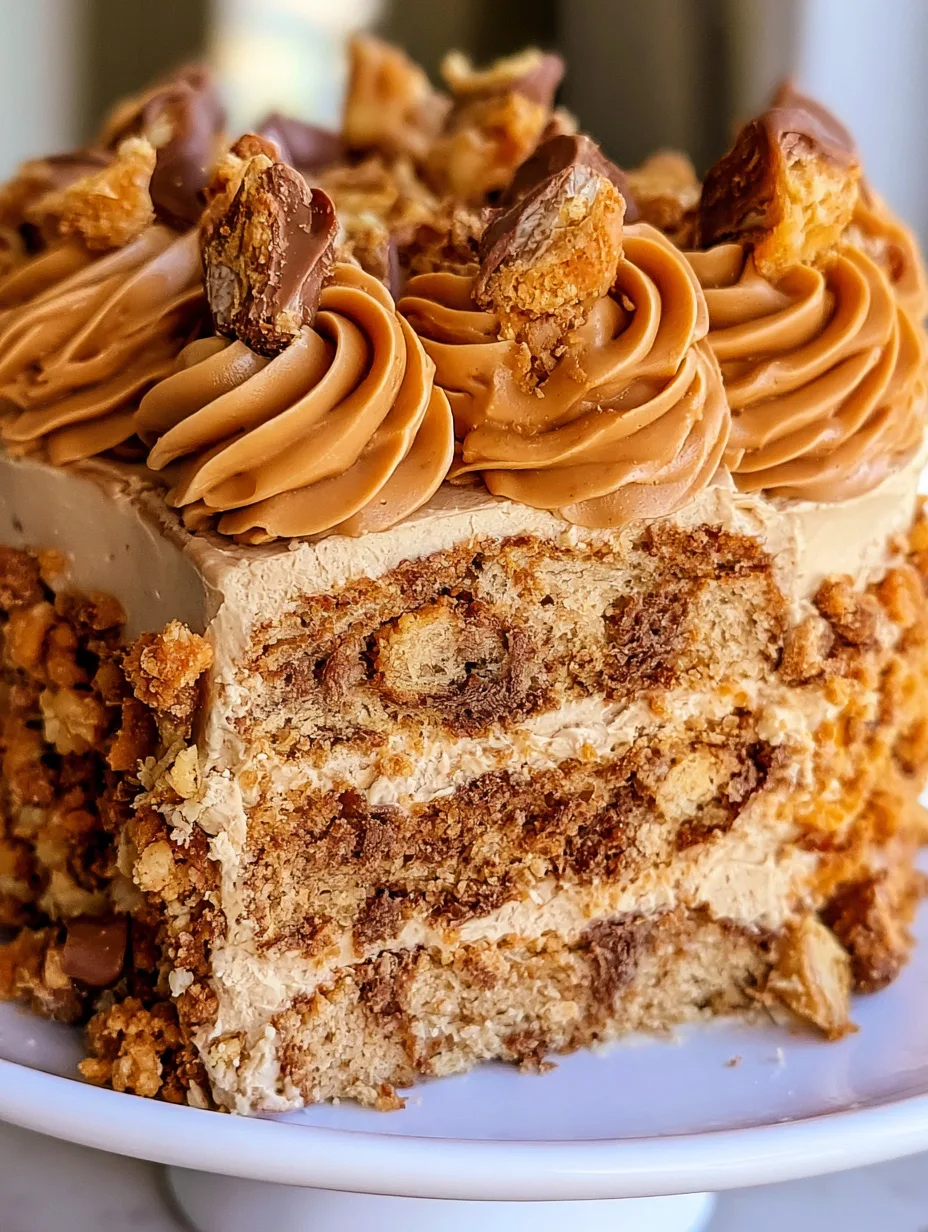
Crunchy Butterfinger pieces, fluffy cake, creamy pudding, and rich chocolate frosting come together in every irresistible bite of Butterfinger Cake Loaded with Crunch. This indulgent dessert transforms simple pantry staples into a crowd-pleasing treat with layers of contrasting textures and classic peanut-butter-and-chocolate flavor. The soft cake absorbs a luscious filling while crushed candy bars add a satisfying crunch throughout. Whether you’re preparing dessert for a birthday, potluck, holiday gathering, or weekend treat, you’ll find this cake wonderfully easy and delicious. You’ll learn how to make a bakery-style dessert with maximum crunch and minimum fuss.
Why You’ll Love This Recipe
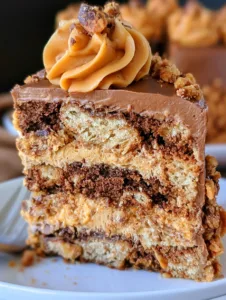
There is something especially satisfying about Butterfinger Cake Loaded with Crunch because every forkful delivers several textures at once. The cake stays soft and tender, the pudding mixture creates a creamy center, and crushed Butterfinger candy adds that signature crisp, flaky crunch. A generous chocolate topping brings everything together with a rich finish.
You also don’t need advanced baking skills to make this dessert. A boxed cake mix provides a dependable foundation, while instant pudding creates a creamy layer without complicated pastry techniques. The candy does much of the flavor work, giving the cake its unmistakable peanut-butter-and-chocolate character.
Another reason to love this recipe is its make-ahead convenience. You can assemble the cake earlier in the day, refrigerate it, and add the final candy topping before serving. That makes it perfect for entertaining when you want a dessert that looks impressive without keeping you in the kitchen all evening.
Ingredients
For the cake, you’ll need 1 box (15.25 oz/432 g) chocolate cake mix, plus the eggs, water, and vegetable oil listed on the package. You can use your favorite chocolate cake mix, although a moist devil’s food variety works especially well.
For the creamy layer, combine 1 box (3.4 oz/96 g) instant vanilla pudding mix with 2 cups (480 ml) cold milk. You’ll also need 8 oz (226 g) cream cheese, softened, and 1 cup (240 ml) whipped topping.
For the topping, prepare 1 container (16 oz/454 g) chocolate frosting and 6 to 8 regular-size Butterfinger candy bars, crushed. Reserve a handful of larger candy pieces for the final garnish. A small pinch of salt can also balance the sweetness if desired.
Pro Tips
1. Cool the cake completely. Don’t rush the cooling stage before adding the creamy layer. A warm cake can soften the pudding mixture too much and make the layers slide. Let the baked cake cool until it reaches room temperature.
2. Crush the Butterfinger bars strategically. Use a mixture of fine crumbs and slightly larger pieces. Fine crumbs distribute peanut-butter flavor throughout the cake, while larger pieces provide the crunchy texture that makes this dessert special. Place the candy in a sealed bag and gently crush it with a rolling pin.
3. Chill before slicing. Refrigeration gives the creamy layer time to firm up and allows the flavors to blend. Chill the assembled cake for at least 2 hours before serving. For especially clean slices, use a sharp knife and wipe the blade between cuts.
For the best texture, add some of the final candy topping shortly before serving. This keeps those pieces extra crisp instead of allowing them to absorb moisture from the frosting.
Instructions
Step 1: Prepare the cake.
Preheat your oven according to the cake mix package directions, usually around 350°F (175°C). Grease a 9 x 13-inch (23 x 33 cm) baking pan. Prepare the chocolate cake batter according to the package instructions, using the required eggs, water, and oil. Pour the batter into the prepared pan and spread it evenly.
Step 2: Bake until tender.
Bake the cake according to the package timing, usually 25 to 30 minutes. Check the center with a toothpick. It should come out clean or with only a few moist crumbs. Avoid overbaking because a dry cake won’t provide the soft texture you want.
Step 3: Cool completely.
Place the pan on a wire rack and allow the cake to cool completely. Do not add the pudding mixture while the cake remains warm. Cooling helps every layer stay distinct.
Step 4: Make the creamy layer.
Whisk the instant vanilla pudding mix with cold milk for about 2 minutes, until it begins to thicken. In a separate bowl, beat the softened cream cheese until smooth. Add the pudding mixture gradually and mix until creamy. Fold in the whipped topping gently to keep the mixture light.
Step 5: Add the filling.
Spread the creamy pudding mixture evenly over the cooled chocolate cake. Use an offset spatula or the back of a spoon to create a smooth, even layer from corner to corner.
Step 6: Add the chocolate frosting.
Spread the chocolate frosting carefully over the creamy layer. If the frosting feels too thick, let it sit at room temperature for several minutes before spreading. Work gently so you don’t disturb the layer underneath.
Step 7: Load it with Butterfinger crunch.
Crush the Butterfinger bars into a combination of crumbs and small chunks. Sprinkle most of the candy evenly over the frosting, pressing a few larger pieces very lightly into the top.
Step 8: Chill and serve.
Cover the cake and refrigerate for at least 2 hours. When you’re ready to serve, add the reserved Butterfinger pieces for extra crunch. Cut into squares and serve cold. For an especially indulgent presentation, add a small spoonful of whipped topping to each slice.
Variations
You can easily customize Butterfinger Cake Loaded with Crunch while keeping its signature chocolate and peanut-butter combination.
For an extra peanut-butter flavor, swirl 1/2 cup (120 g) creamy peanut butter into the pudding mixture before folding in the whipped topping. This creates a richer filling with even more nutty flavor.
For a shortcut version, use a prepared chocolate sheet cake instead of baking a boxed cake mix. This works particularly well when you need dessert quickly.
You can also change the candy topping. Add chopped peanut-butter cups alongside the Butterfinger pieces for a more intense peanut-butter profile. Alternatively, use a combination of chocolate sandwich cookie crumbs and Butterfinger pieces for an extra-crunchy chocolate variation.
Storage and Serving
Store Butterfinger Cake Loaded with Crunch covered tightly in the refrigerator. Because the recipe contains pudding, cream cheese, and whipped topping, keep it chilled and avoid leaving it at room temperature for extended periods. For the best quality, enjoy leftovers within 3 to 4 days.
For serving, cut the cake into generous squares and place each piece on a dessert plate. A spoonful of whipped topping makes an easy garnish, while a light drizzle of chocolate syrup adds extra decadence.
You can also serve smaller squares as part of a dessert buffet. Since the cake is rich, modest portions work beautifully after a large meal. For parties, prepare the cake several hours ahead and add the final crunchy candy pieces just before guests arrive.
FAQs
Can I make this cake ahead of time?
Yes. You can assemble the cake several hours before serving and keep it refrigerated. Add the final candy pieces shortly before serving for the best crunch.
Can I use homemade chocolate cake?
Absolutely. A homemade chocolate sheet cake works beautifully. Just make sure it cools completely before adding the creamy layer.
Why is my pudding layer too runny?
The pudding needs cold milk and enough mixing time to thicken. Also, make sure you use instant pudding rather than cook-and-serve pudding.
Can I freeze this cake?
Freezing can change the texture of the pudding and whipped topping, so refrigeration provides the best results. If necessary, freeze individual portions tightly wrapped, then thaw them overnight in the refrigerator.
How do I keep the Butterfinger topping crunchy?
Reserve some candy pieces and sprinkle them over the cake immediately before serving. This prevents them from becoming soft after sitting against the moist frosting and filling.
This Butterfinger Cake Loaded with Crunch is comfort food at its finest, a rich chocolate dessert layered with creamy pudding and finished with irresistible peanut-butter candy crunch. It’s the kind of dish that turns ordinary gatherings into memorable celebrations, whether you’re serving it at a family dinner, birthday party, potluck, or weekend get-together. The soft cake, silky filling, chocolate frosting, and crisp Butterfinger pieces create a dessert everyone will want another slice of. Make it ahead, chill it well, and finish it with plenty of candy for a crowd-pleasing treat that’s as easy as it is indulgent.
Print
Butterfinger Cake Loaded with Crunch
- Total Time: 45
Description
This cake is pure chocolate-peanut butter bliss, with a creamy center and irresistible Butterfinger crunch in every bite. It is the easy dessert everyone will be asking you to make again.
Ingredients
- 1 box (15.25 oz/432 g) chocolate cake mix
- Eggs, water, and vegetable oil as required on cake mix package
- 1 box (3.4 oz/96 g) instant vanilla pudding mix
- 2 cups (480 ml) cold milk
- 8 oz (226 g) cream cheese, softened
- 1 cup (240 ml) whipped topping
- 1 container (16 oz/454 g) chocolate frosting
- 6 to 8 regular-size Butterfinger candy bars, crushed
- Whipped topping, optional for serving
- Chocolate syrup, optional for serving
Instructions
- Preheat the oven according to the cake mix package directions, usually to 350°F (175°C). Grease a 9 x 13-inch baking pan.
- Prepare the chocolate cake mix according to package directions and spread the batter evenly in the prepared pan.
- Bake according to package directions, usually 25 to 30 minutes, until a toothpick inserted in the center comes out clean or with a few moist crumbs.
- Cool the cake completely on a wire rack before adding the next layer.
- Whisk the instant vanilla pudding mix with cold milk for about 2 minutes until thickened.
- Beat the softened cream cheese until smooth, then gradually mix in the pudding mixture.
- Gently fold in the whipped topping until the filling becomes light and creamy.
- Spread the creamy pudding mixture evenly over the cooled chocolate cake.
- Carefully spread the chocolate frosting over the creamy layer.
- Crush the Butterfinger candy bars into a mixture of fine crumbs and small chunks.
- Sprinkle most of the crushed candy evenly over the frosting and reserve some larger pieces for garnish.
- Cover and refrigerate the cake for at least 2 hours.
- Add the reserved Butterfinger pieces just before serving for extra crunch.
- Cut into squares and serve chilled, with optional whipped topping or chocolate syrup.
- Prep Time: 10
- Cook Time: 15