
Introduction
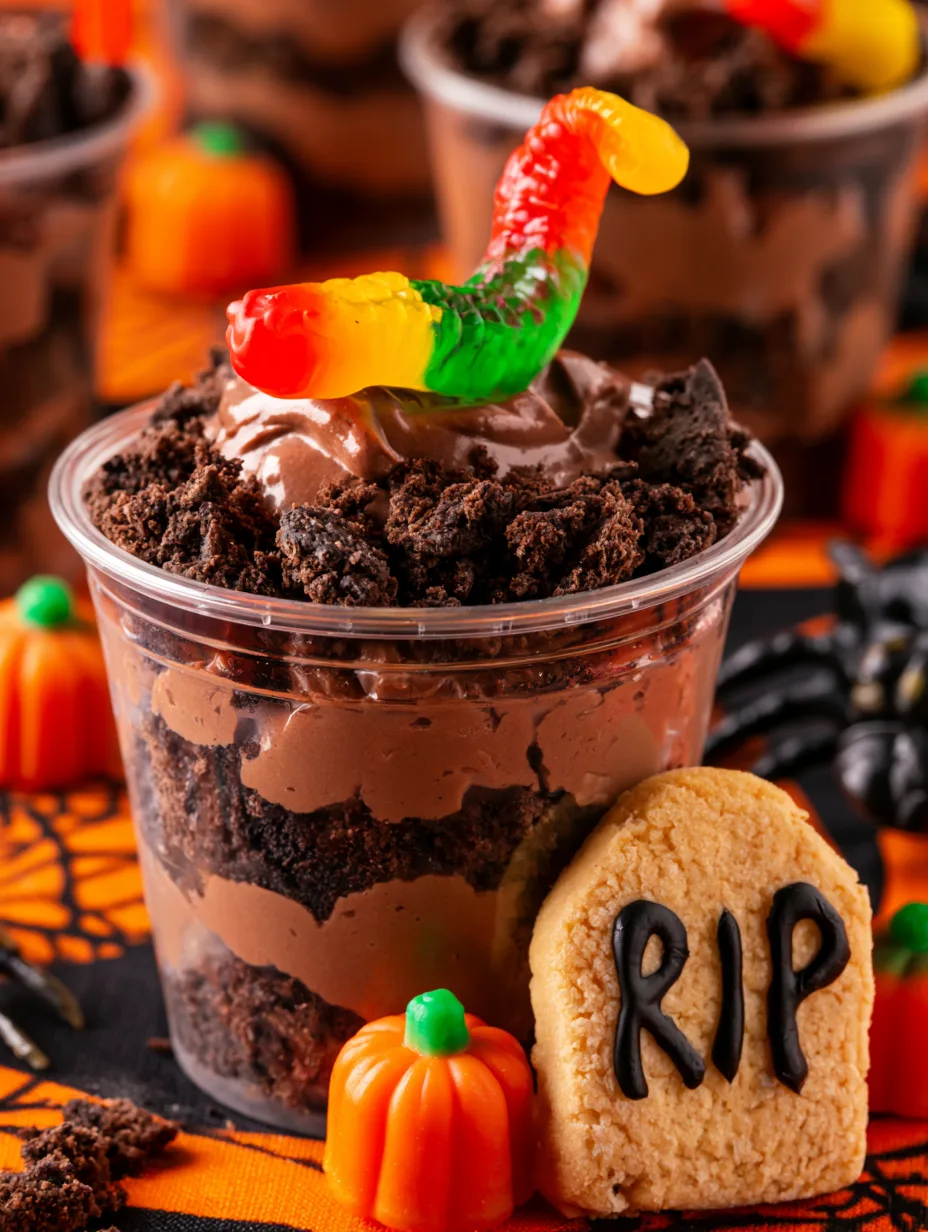
Gooey chocolate pudding, crushed Oreo cookies, and playful gummy worms come together in these Halloween Dirt Cups for a spooky dessert everyone will love. Each cup delivers creamy, chocolatey pudding beneath a crunchy cookie “dirt” topping, while colorful candy worms create the perfect Halloween surprise. They take little effort but look wonderfully festive on a party table. Whether you’re hosting a Halloween gathering or making treats with kids, these dirt cups make dessert extra fun. You’ll learn how to create an easy Halloween dessert that looks impressive without complicated baking.
Why You’ll Love This Recipe
These Halloween Dirt Cups check all the boxes for a festive treat: they’re quick, affordable, kid-friendly, and incredibly easy to assemble. You don’t need an oven, complicated decorating skills, or a long ingredient list. Simply prepare the creamy pudding, crush the cookies, and layer everything into individual cups.
The texture contrast makes every spoonful especially satisfying. Smooth, silky chocolate pudding meets crisp Oreo crumbs, while chewy gummy worms add a playful candy bite. The combination feels indulgent without requiring a complicated dessert recipe.
Individual portions also make these Halloween dirt pudding cups perfect for parties. Everyone gets their own little cup, so serving stays simple and mess-free. Kids can even help crush cookies, spoon in the pudding, and decorate each cup with worms.
You can prepare them ahead of time, customize the decorations, and make the presentation as spooky or silly as you like. For Halloween parties, classroom celebrations, family movie nights, or an October afternoon treat, these cups bring plenty of festive fun.
Ingredients
For these Halloween Dirt Cups, you’ll need simple grocery-store ingredients.
- 3.4 oz (96 g) instant chocolate pudding mix for a rich chocolate base
- 3 cups (720 ml) cold whole milk for smooth, creamy pudding
- 12.8 oz (363 g) Oreo cookies or chocolate sandwich cookies for the crunchy dirt topping
- 8 oz (226 g) whipped topping, thawed, for extra creaminess
- 12-16 gummy worms for the classic Halloween decoration
- 8 small clear plastic cups, approximately 8 oz (240 ml) each, for individual servings
You can use regular or chocolate-flavored sandwich cookies. Clear cups work especially well because they show the spooky layers. If you want a slightly richer pudding texture, whole milk gives the dessert a particularly creamy finish.
Pro Tips
First, crush the cookies to the right texture. You want mostly fine crumbs that resemble dark soil, with a few slightly larger pieces for crunch. A food processor makes the job quick, but you can also place the cookies in a sealed bag and crush them with a rolling pin.
Second, give the pudding enough time to thicken. Whisk the instant pudding mix with cold milk until smooth, then let it stand according to the package directions. A properly thickened pudding creates clean layers and prevents the cookie crumbs from sinking too quickly.
Third, assemble the cups shortly before serving if you want maximum cookie crunch. The crumbs soften slightly as they sit against the pudding, which can actually be delicious, but fresh assembly gives you the strongest texture contrast.
For an especially festive presentation, gently tuck a gummy worm partly into the cookie crumbs. Leave a little of each worm visible so guests immediately recognize the spooky theme.
Step-by-Step Instructions
Step 1: Crush the Cookies
Place the Oreo cookies in a food processor and pulse until they resemble dark soil. Don’t process them into a completely smooth powder. A few small chunks add texture and make the “dirt” look more realistic.
If you don’t have a food processor, put the cookies into a sturdy zip-top bag. Seal it tightly and crush them with a rolling pin. This method also gives you more control over the final texture.
Step 2: Prepare the Chocolate Pudding
Pour the cold milk into a large mixing bowl. Add the instant chocolate pudding mix and whisk vigorously for about 2 minutes, or until the mixture thickens and becomes smooth.
Let the pudding rest for a few minutes so it reaches a spoonable consistency. If it still looks loose, give it another minute before assembling the cups.
Step 3: Fold in the Whipped Topping
Add the thawed whipped topping to the chocolate pudding. Fold gently with a spatula until the mixture looks creamy and evenly combined.
Avoid aggressive stirring because you want to keep the mixture light and fluffy. The whipped topping gives the pudding a softer, mousse-like texture that works beautifully in layered desserts.
Step 4: Start Layering
Spoon a layer of chocolate pudding mixture into the bottom of each clear cup. Add enough to cover the base without filling more than one-third of the cup.
Next, sprinkle a layer of crushed Oreo cookies over the pudding. Don’t worry about making every layer perfectly even. Slightly irregular layers make the dessert look more like spooky ground.
Step 5: Add Another Pudding Layer
Spoon another layer of chocolate pudding over the cookie crumbs. Use the back of a spoon to gently smooth the surface if needed.
Continue alternating pudding and crushed cookies until the cups are nearly full. Finish with a generous layer of cookie crumbs because this creates the signature dirt effect.
Step 6: Add the Gummy Worms
Now comes the fun part. Push one or two gummy worms partly into the cookie topping of each cup. Position them at different angles so every serving looks slightly different.
For a more dramatic Halloween display, let some worms hang over the edge of the cup while others peek out from beneath the crumbs.
Step 7: Chill and Serve
Place the finished cups in the refrigerator for at least 30 minutes before serving. Chilling helps the layers settle and gives the pudding a cool, creamy texture.
Serve cold and enjoy these fun Halloween treats with family or guests. For the best visual effect, keep the cups chilled until you’re ready to put them on the dessert table.
Variations
There are several easy ways to customize these Halloween Dirt Cups (Easy & Quick Recipe). For a peanut butter version, stir a spoonful of creamy peanut butter into the pudding before adding the whipped topping. The chocolate and peanut butter combination creates a richer dessert.
For a mint-chocolate variation, use mint chocolate sandwich cookies instead of regular Oreos. Add a few chocolate candies on top for extra decoration.
You can also make a dairy-free version by choosing plant-based milk and dairy-free whipped topping that work with your chosen pudding mix. Always check package labels to ensure the products meet your dietary needs.
For a colorful party version, add candy eyes, chocolate spiders, or Halloween sprinkles. You can even create different themes by using crushed chocolate cookies as the base for graveyard-style dessert cups.
Storage/Serving
Store assembled Halloween Dirt Cups covered in the refrigerator. They taste best within 1-2 days, although the cookie crumbs will gradually soften as they sit in the pudding. If you want maximum crunch, prepare the pudding and cookie crumbs separately, then assemble the cups a few hours before serving.
Serve these individual desserts chilled with a small spoon. They make an easy addition to a Halloween dessert table alongside cookies, cupcakes, brownies, or fruit.
For parties, arrange the cups on a large tray and decorate the space around them with extra Halloween candies. You can also place small labels beside the cups with playful names such as “Wormy Dirt,” “Graveyard Pudding,” or “Monster Mud.”
If children are helping, set out the toppings and let them decorate their own cups. This turns dessert preparation into a simple Halloween activity.
FAQs
Can I make Halloween Dirt Cups ahead of time?
Yes. You can prepare them several hours before serving and keep them refrigerated. For crunchier crumbs, add the final cookie layer closer to serving time.
Can I use homemade chocolate pudding?
Absolutely. Homemade pudding works well, although you should cool it completely before layering so it doesn’t soften the cookies too quickly.
What cookies work best for the dirt topping?
Oreo cookies or similar chocolate sandwich cookies work beautifully. Chocolate wafer cookies can also create a convincing dark “dirt” appearance.
Can I make these without gummy worms?
Yes. Replace gummy worms with candy eyes, chocolate spiders, Halloween sprinkles, candy pumpkins, or other festive decorations.
How long do dirt cups last in the refrigerator?
They are best enjoyed within 1-2 days. Keep them covered and refrigerated until serving for the best flavor and texture.
This Halloween Dirt Cups (Easy & Quick Recipe) is comfort food at its finest, transformed into a playful Halloween dessert with creamy chocolate pudding, crunchy cookie crumbs, and chewy gummy worms. It’s the kind of dish that makes Halloween parties, family gatherings, and spooky movie nights feel extra special. Kids love decorating their own cups, while adults appreciate how little preparation the recipe requires. With no baking and only a handful of simple ingredients, you can create a fun dessert that looks festive, tastes delicious, and brings plenty of Halloween excitement to the table.
Print
Halloween Dirt Cups (Easy & Quick Recipe)
- Total Time: 45
Description
These spooky Halloween Dirt Cups are the easiest party dessert you can make this season. They are creamy, crunchy, playful, and guaranteed to make everyone smile.
Ingredients
- 3.4 oz. (96 g) instant chocolate pudding mix
- 3 cups (720 ml) cold whole milk
- 12.8 oz. (363 g) Oreo cookies or chocolate sandwich cookies
- 8 oz. (226 g) whipped topping, thawed
- 12–16 gummy worms
- 8 small clear plastic cups, approximately 8 oz. (240 ml) each
Instructions
- Crush the Oreo cookies into fine crumbs with a few small chunks remaining.
- Whisk the chocolate pudding mix with cold milk for about 2 minutes, until thick and smooth.
- Let the pudding stand for a few minutes, then gently fold in the whipped topping.
- Spoon a layer of chocolate pudding into each clear cup.
- Sprinkle a layer of crushed cookies over the pudding.
- Add another layer of chocolate pudding and repeat until the cups are nearly full.
- Finish each cup with a generous layer of crushed cookies to create the dirt topping.
- Place one or two gummy worms partly into the cookie crumbs.
- Refrigerate the cups for at least 30 minutes before serving.
- Serve chilled and enjoy.
- Prep Time: 15
- Category: Cooking
- Cuisine: American