
Introduction
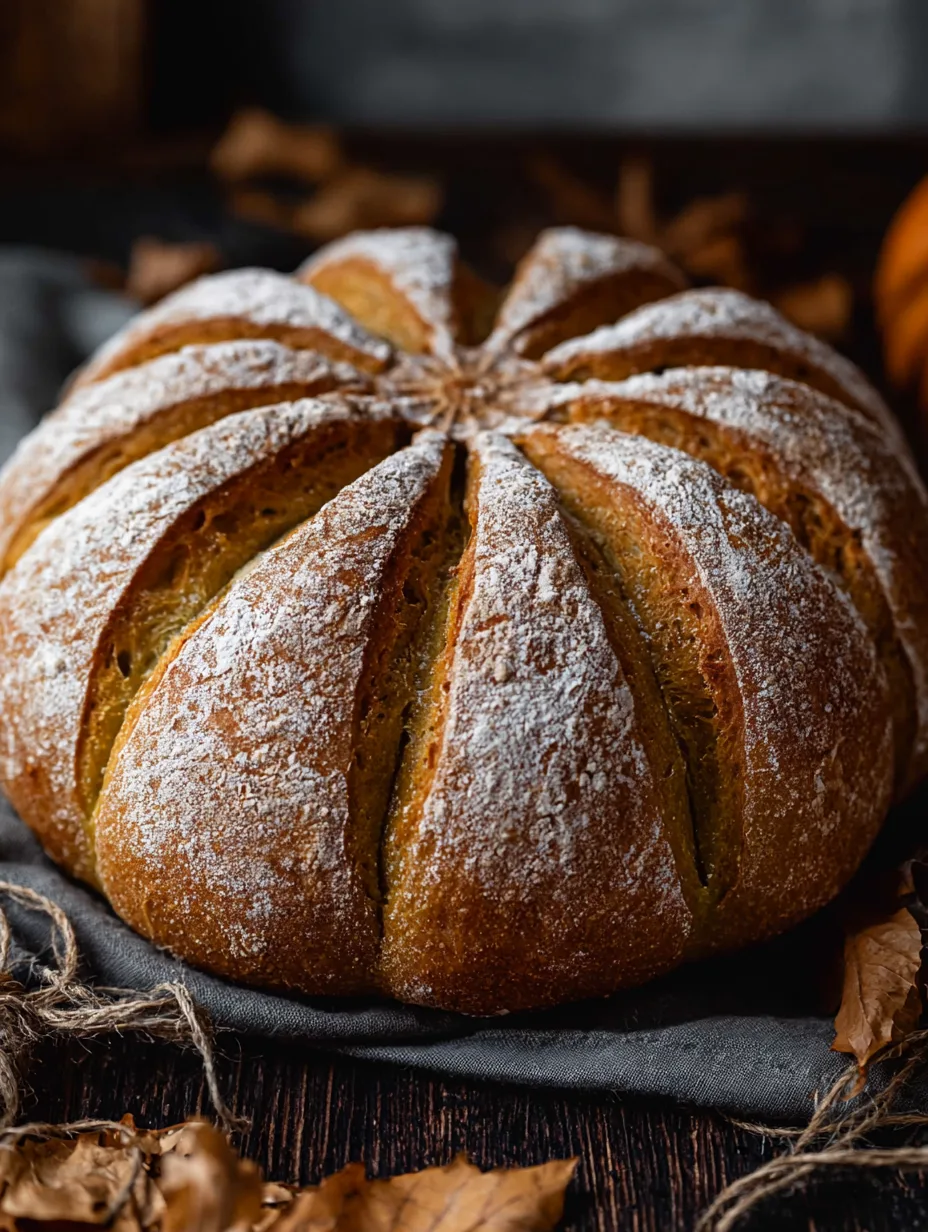
Warm, aromatic, and beautifully golden, Pumpkin Sourdough Bread brings together the tangy character of a naturally fermented loaf with the cozy flavor of pumpkin. Each slice has a tender, lightly chewy crumb, a crisp crust, and subtle notes of cinnamon and maple that make it perfect for fall mornings. Pumpkin adds moisture and richness while sourdough starter gives the bread its signature depth. Whether you toast it for breakfast or serve it beside a hearty soup, this loaf feels special without being complicated. You’ll learn how to make a flavorful homemade loaf that fits beautifully into your autumn baking routine.
Why You’ll Love This Recipe
There is something wonderfully comforting about pulling a freshly baked loaf of Pumpkin Sourdough Bread from the oven. The crust develops a deep golden color while the inside stays soft, moist, and pleasantly chewy. Pumpkin puree gives the crumb a delicate tenderness without making it heavy, while active sourdough starter adds a gentle tang that balances the natural sweetness.
You will also love the texture contrast. The exterior offers a satisfying crust, while the center remains fluffy enough for generous spreads of butter. A little maple syrup adds warmth without turning the loaf into a dessert.
This recipe also gives you plenty of flexibility. You can shape the dough into a traditional boule or bake it in a loaf pan for neat, sandwich-style slices. The dough takes time because sourdough needs fermentation, but most of that time requires very little hands-on work.
The result is a rustic pumpkin bread that tastes far more impressive than the effort suggests. It works for breakfast, afternoon snacking, holiday brunches, and cozy dinners alike.
Ingredients
For one medium loaf of Pumpkin Sourdough Bread, gather simple pantry staples and an active sourdough starter.
- 100 g (about 1/2 cup) active sourdough starter
- 240 g (1 cup) pumpkin puree, preferably plain canned pumpkin
- 350 g (2 3/4 cups) bread flour
- 50 g (about 1/4 cup) whole wheat flour
- 80 g (1/3 cup) water, plus more if needed
- 30 g (2 tablespoons) pure maple syrup
- 20 g (1 1/2 tablespoons) melted unsalted butter or neutral oil
- 8 g (1 1/4 teaspoons) fine sea salt
- 1 teaspoon ground cinnamon
- 1/2 teaspoon ground nutmeg
- 1/4 teaspoon ground ginger
Use pumpkin puree rather than pumpkin pie filling. Pie filling contains added sugar and spices, which can change the dough’s consistency and flavor. An active starter should look bubbly and rise noticeably after feeding.
Pro Tips
1. Use an active starter. Your sourdough starter provides the leavening power, so timing matters. Feed it several hours before mixing and use it when it looks bubbly, expanded, and lively. A sluggish starter can leave the loaf dense.
2. Watch the dough, not just the clock. Pumpkin puree contains varying amounts of moisture, so your dough may need slightly more or less water. Start with the recommended amount and add water gradually if the dough feels unusually stiff. The finished dough should feel soft, elastic, and slightly tacky rather than wet and sloppy.
3. Give fermentation enough time. Sourdough develops flavor slowly. Let the dough rise somewhere comfortably warm until it looks noticeably expanded and airy. Depending on your starter and kitchen temperature, this may take several hours. For extra flavor and convenient scheduling, refrigerate the shaped dough overnight before baking.
A final tip: avoid adding too much flour while handling the dough. Extra flour can create a tight crumb and reduce the soft texture that makes Pumpkin Sourdough Bread so enjoyable.
Instructions
Step 1: Prepare the starter and ingredients
Make sure your sourdough starter is active before you begin. Measure the pumpkin puree, water, maple syrup, melted butter, and spices. Keep the salt separate initially because you will add it after the dough starts developing.
Step 2: Mix the dough
In a large mixing bowl, combine the active starter, pumpkin puree, water, maple syrup, and melted butter. Stir until the mixture looks mostly smooth. Add the bread flour, whole wheat flour, cinnamon, nutmeg, and ginger. Mix with a wooden spoon or your hands until no large patches of dry flour remain.
Cover the bowl and let the dough rest for about 30 minutes. This short rest gives the flour time to hydrate and makes the dough easier to strengthen.
Step 3: Add the salt
Sprinkle the salt over the dough. Use damp hands to pinch, fold, and squeeze the dough until the salt distributes evenly. Continue working it gently until the mixture feels cohesive.
Step 4: Build strength
Over the next 2 hours, perform a series of stretch-and-folds every 30 minutes. Grab one side of the dough, stretch it upward without tearing, and fold it across the center. Turn the bowl and repeat on all four sides.
As you work, the dough should become smoother, stronger, and more elastic.
Step 5: Bulk ferment
Cover the bowl and let the dough continue fermenting in a warm area. Look for an increase in volume of roughly 50 to 75 percent, along with small bubbles around the edges. Do not rely solely on a timer because room temperature and starter activity can change the fermentation speed.
Step 6: Shape the loaf
Lightly flour your work surface and gently turn out the dough. Shape it into a tight boule by folding the edges toward the center and creating surface tension. Place the shaped loaf seam-side up in a floured banneton or lined bowl.
Step 7: Proof
Cover the dough and let it proof at room temperature until it becomes slightly puffy. You can also refrigerate it for 8 to 12 hours. The cold proof develops deeper flavor and makes the dough easier to score.
Step 8: Preheat the oven
Place a Dutch oven inside your oven and preheat to 475°F (245°C) for at least 30 to 45 minutes. A thoroughly heated Dutch oven helps create the steam needed for a crisp crust.
Step 9: Score and bake
Carefully transfer the dough onto parchment paper. Score the top with a sharp bread lame or knife. Lower the dough into the hot Dutch oven, cover it, and bake for 20 minutes.
Remove the lid, reduce the temperature to 450°F (230°C), and bake for another 20 to 25 minutes, or until the loaf develops a rich golden-brown crust.
Step 10: Cool completely
Transfer the loaf to a wire rack. Let it cool for at least 1 to 2 hours before slicing. This final resting period allows the interior to finish setting and keeps your slices from becoming gummy.
Variations
You can easily customize Pumpkin Sourdough Bread to match your favorite fall flavors. For a sweeter loaf, add 75 g (1/2 cup) of chocolate chips or chopped pecans. Dark chocolate creates a richer contrast with the pumpkin, while pecans add a pleasant crunch.
For a more savory version, skip the maple syrup and sweet spices, then add 1 teaspoon of dried rosemary and a pinch of black pepper. This variation pairs especially well with soups and roasted vegetables.
You can also make a whole-grain pumpkin loaf by replacing up to 100 g (about 3/4 cup) of the bread flour with additional whole wheat flour. Keep in mind that whole wheat flour absorbs more liquid, so you may need a small splash of water.
For a dairy-free loaf, use olive oil or another neutral plant-based oil instead of butter. These simple adjustments let you turn the same base recipe into several delicious versions.
Storage and Serving
Once completely cool, store Pumpkin Sourdough Bread at room temperature in a bread bag, paper bag, or loosely wrapped kitchen towel for up to 3 days. Avoid sealing warm bread in an airtight container because trapped moisture can soften the crust.
For longer storage, slice the loaf and freeze the pieces in a freezer-safe bag for up to 3 months. Toast slices directly from frozen whenever you need a quick breakfast.
Serve thick slices with salted butter, cream cheese, or maple butter. You can also toast the bread and top it with almond butter for a satisfying snack. During fall, it makes a wonderful companion to creamy tomato soup, butternut squash soup, or a hearty stew.
For breakfast, serve warm slices alongside scrambled eggs and fresh fruit. The mild pumpkin flavor also makes this loaf excellent for French toast.
FAQs
Can I use canned pumpkin puree?
Yes. Plain canned pumpkin works very well and provides consistent moisture. Avoid pumpkin pie filling because it contains additional ingredients.
Why is my sourdough bread dense?
A dense loaf usually results from an inactive starter, insufficient fermentation, or overworking the dough with excess flour. Give your starter time to become bubbly before mixing.
Can I make this bread without whole wheat flour?
Absolutely. Replace the whole wheat flour with an equal amount of bread flour. The loaf will have a slightly lighter texture and milder flavor.
Can I refrigerate the dough overnight?
Yes. An overnight cold proof can improve flavor and make baking easier the following day. Cover the shaped dough well before refrigerating.
How do I know when the bread is finished baking?
Look for a deep golden-brown crust and a firm exterior. If you use an instant-read thermometer, the center should reach roughly 200–205°F (93–96°C). Always cool the loaf before slicing.
This Pumpkin Sourdough Bread is comfort food at its finest — a golden, fragrant loaf with a crisp crust, tender pumpkin-infused crumb, and just the right touch of warm autumn spice. It’s the kind of bread that makes slow weekend breakfasts, cozy afternoons, and fall gatherings feel extra special. Serve it toasted with butter, pair it with a bowl of soup, or enjoy a slice straight from the cutting board. Once you experience the combination of naturally fermented flavor and pumpkin warmth, this homemade loaf may become one of your favorite recipes for the season.
Print
Pumpkin Sourdough Bread
- Total Time: 45
Description
Bring the cozy flavors of fall to your kitchen with a golden, tender sourdough loaf packed with pumpkin warmth and irresistible homemade flavor.
Ingredients
- 100 g (about 1/2 cup) active sourdough starter
- 240 g (1 cup) pumpkin puree
- 350 g (2 3/4 cups) bread flour
- 50 g (about 1/4 cup) whole wheat flour
- 80 g (1/3 cup) water, plus more if needed
- 30 g (2 tablespoons) pure maple syrup
- 20 g (1 1/2 tablespoons) melted unsalted butter or neutral oil
- 8 g (1 1/4 teaspoons) fine sea salt
- 1 teaspoon ground cinnamon
- 1/2 teaspoon ground nutmeg
- 1/4 teaspoon ground ginger
Instructions
- Combine active sourdough starter, pumpkin puree, water, maple syrup, and melted butter. Add the flours and spices and mix until no dry flour remains. Rest for 30 minutes.
- Add the salt and gently pinch and fold the dough until evenly incorporated.
- Perform stretch-and-folds every 30 minutes for about 2 hours to strengthen the dough.
- Cover and allow the dough to bulk ferment until it increases in volume by roughly 50 to 75 percent and looks airy.
- Gently shape the dough into a tight boule and place it seam-side up in a floured banneton or lined bowl.
- Proof at room temperature until slightly puffy, or refrigerate for 8 to 12 hours for an overnight cold proof.
- Preheat a Dutch oven at 475°F (245°C) for 30 to 45 minutes.
- Transfer the dough to parchment paper, score the top, and carefully place it in the hot Dutch oven.
- Cover and bake for 20 minutes. Remove the lid, reduce the temperature to 450°F (230°C), and bake for another 20 to 25 minutes.
- Transfer the loaf to a wire rack and cool completely for 1 to 2 hours before slicing.
- Prep Time: 15
- Category: Baking
- Cuisine: American